- Published on
How did I get here?

Admiring the Waterfall

When a painting is finished, the elements should lock together like a well-crafted story. You feel the inevitability of the composition but the steps to reach the conclusion are no longer evident. I paint in what is called "Splashing Ink" or "Spontaneous Style", which means that it is more the dance of the brush that leads me on. However, I do still follow a process, so I will be putting in the broad outlines before adding the details. As my teacher Professor I-Hsiung Ju would remind me: put the roof on the house before adding the drapes and furniture! So let's break down this painting's process, step by step:
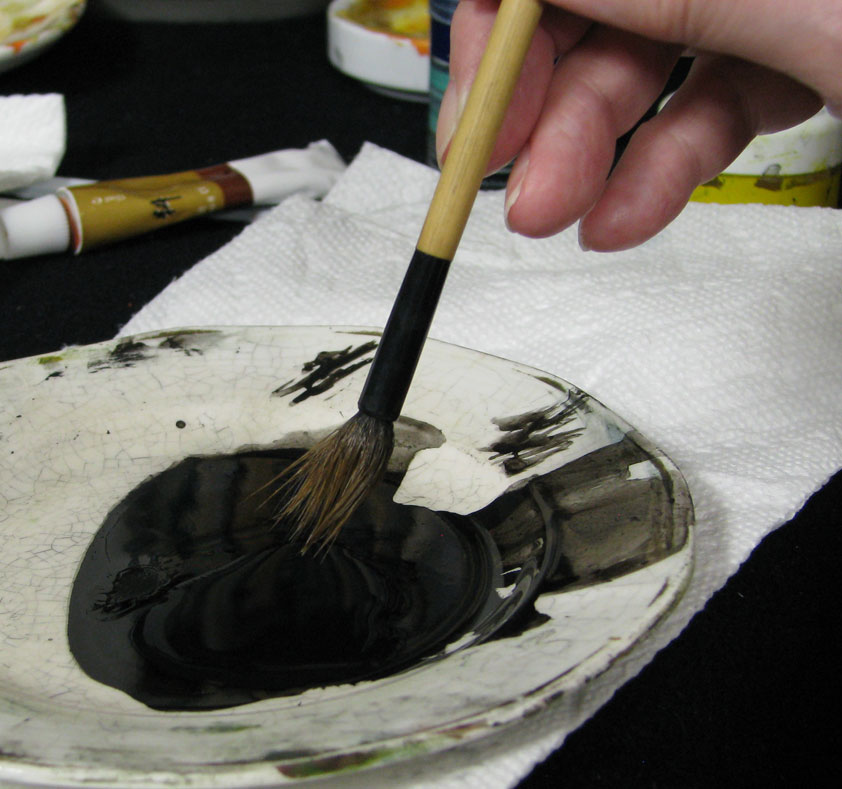
Since I had no composition in mind, letting this long, bouncy brush (from HMay Art) spring from rock to rock seemed like fun. My paper is a thin, raw xuan so my brush needed to be on the dry side. I loaded it with grey then added ground black ink to the tip of the brush.
Tip: It's always a good idea to keep a scrap of practice paper next to your ink so you can check the color and the amount of moisture on your brush before touching your painting.
Tip: It's always a good idea to keep a scrap of practice paper next to your ink so you can check the color and the amount of moisture on your brush before touching your painting.

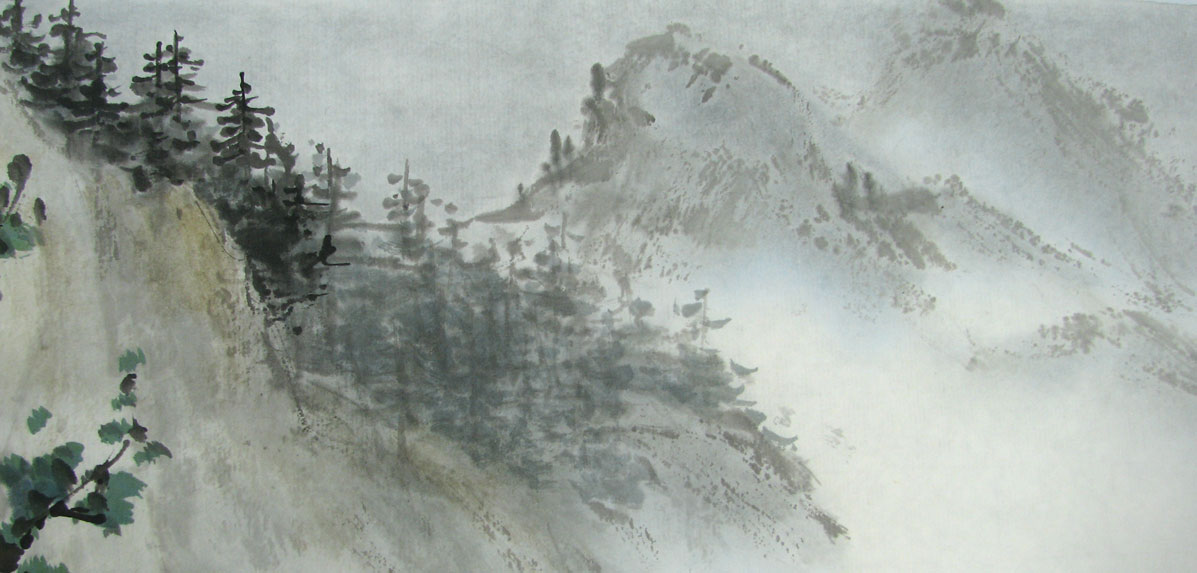
Step 1: Black Ink Sketch of Waterfall

Some of the strokes look almost abstract. How about some foreground to help the image to emerge? As soon as I add foreground elements, the waterfall will recede and I will have more sense of depth.

Step 2: Add Foreground Trees & Rocks
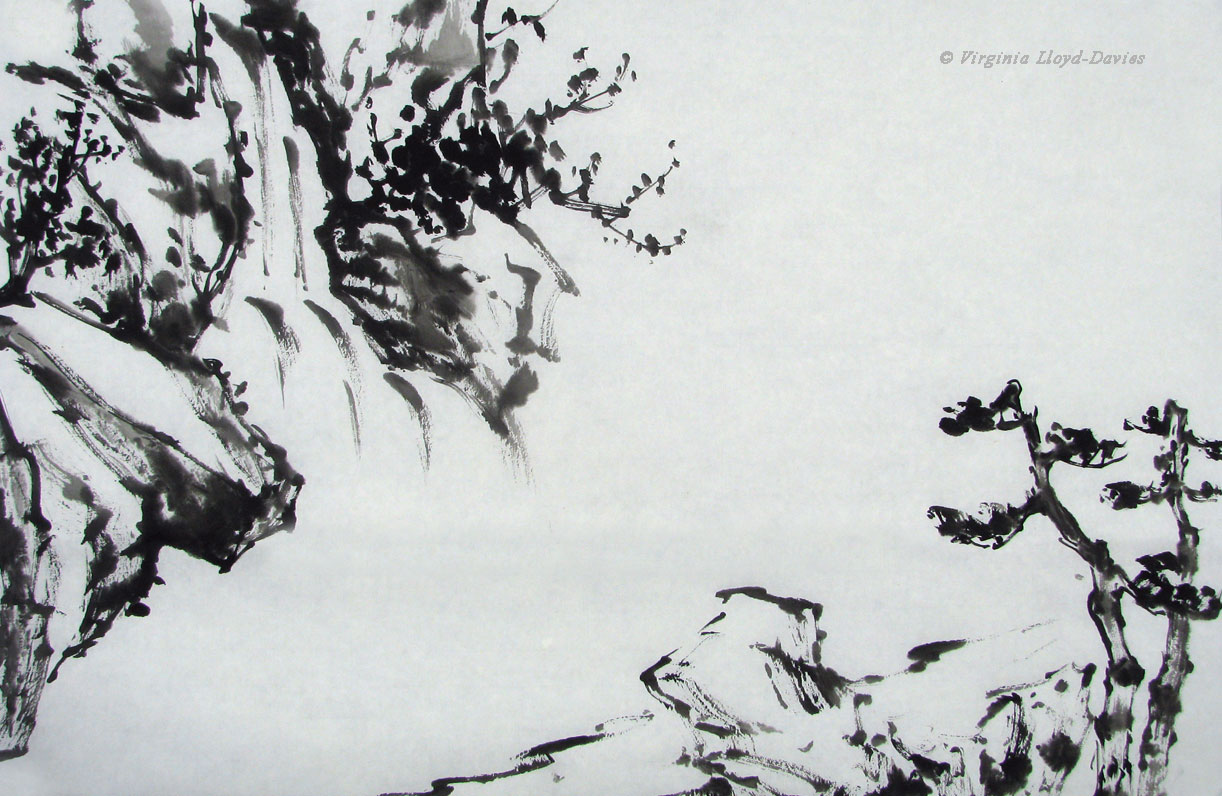
Since the waterfall has a diagonal motion, it's good to have the foreground moving on the opposite diagonal, creating a V shape.
Tip: Avoid having anything begin or end right in the corner!
Tip: Avoid having anything begin or end right in the corner!
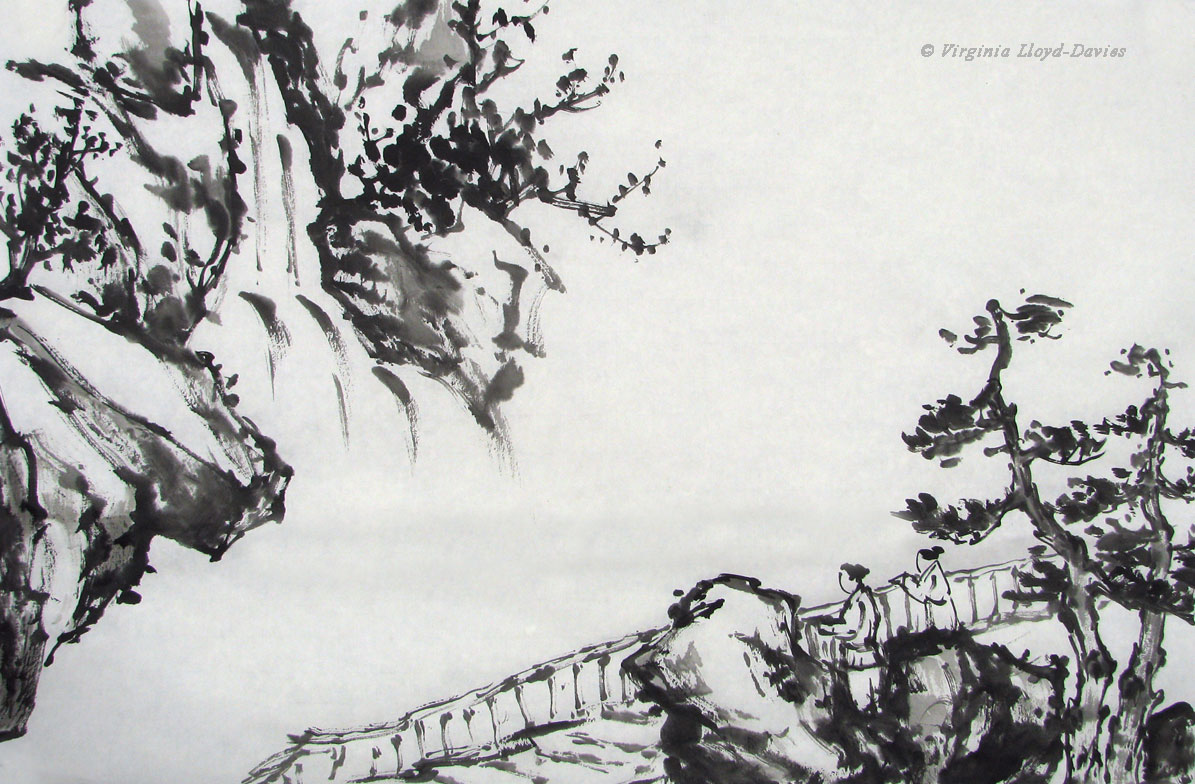
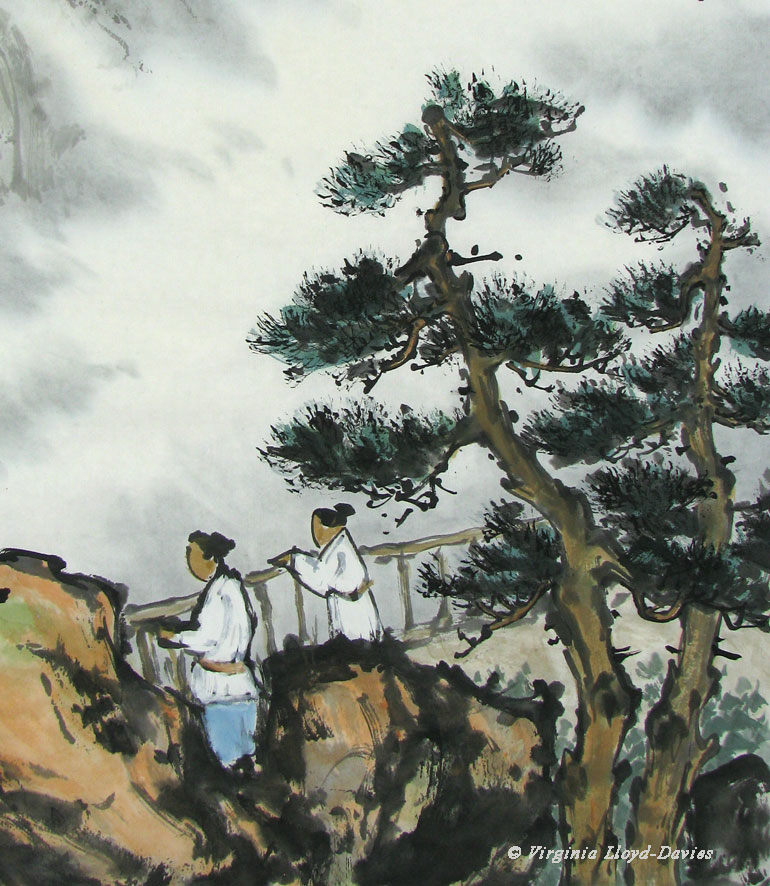
Step 3: Add People and Railing

Oh look, it's a viewing platform! In that case, I need people. True confession: the child on the right ended up too short, so I added another rock this side of the figure to cover up my mistake, thereby adding another layer of depth. The rock's a bit heavy, but you probably wouldn't have guessed my sneaky save!
Tip: Switch to a smaller brush for figures (I used my Happy Dot brush from OAS). If you're not sure what size to paint the figures, try them out on a separate piece of paper and place it under your painting to see if it looks right. Keep trying until it looks good. If I had followed my own advice, I might not have needed to stick in the rock!
Tip: Switch to a smaller brush for figures (I used my Happy Dot brush from OAS). If you're not sure what size to paint the figures, try them out on a separate piece of paper and place it under your painting to see if it looks right. Keep trying until it looks good. If I had followed my own advice, I might not have needed to stick in the rock!

Step 4: Start Coloring
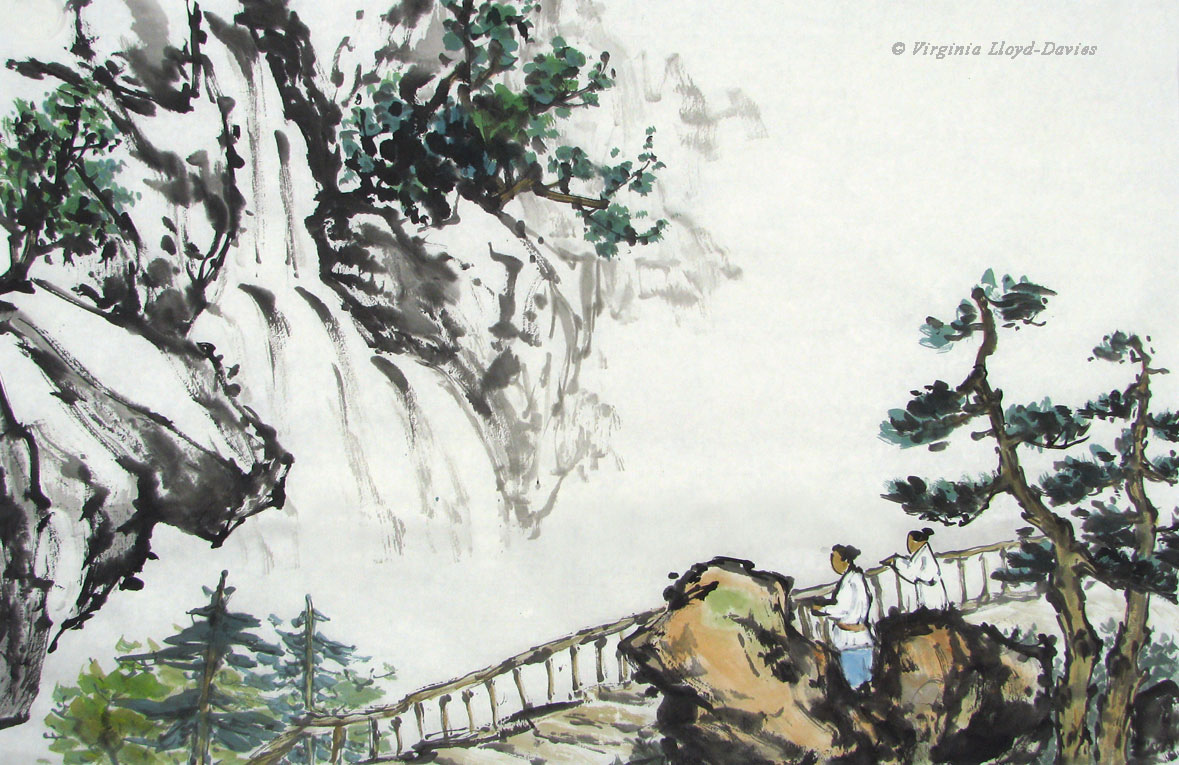
If you add color lightly, you can always change the hue or the intensity. I added some light trees in the lower left to push the waterfall back a bit. I'll add a bit more detail to these pines later.

Step 5: Mountains Complete the Bones of the Composition
I've added white to the observers' clothes, so that when I add the background misty wash, the figures will stand out more. I've extended the landscape off into the distance, being careful to keep my greys light. If I added black to the mountains I would need to darken everything from that point forward.
Next I need to create the mist, and for this I will take the painting off the easel.
Next I need to create the mist, and for this I will take the painting off the easel.

Step 6: Creating the Mist

This is the painting on a black blanket. I created the background wash by spraying the painting with water and adding color on the backside of the paper. This allows a softer effect for the mist. I used indigo and black ink with a lot of water for this.
Tip: take into account, when you are mixing your color, that it will dry much lighter, especially when added to the back of the paper. Of course, if it is too light after it dries, you can do another wash.
Tip: take into account, when you are mixing your color, that it will dry much lighter, especially when added to the back of the paper. Of course, if it is too light after it dries, you can do another wash.
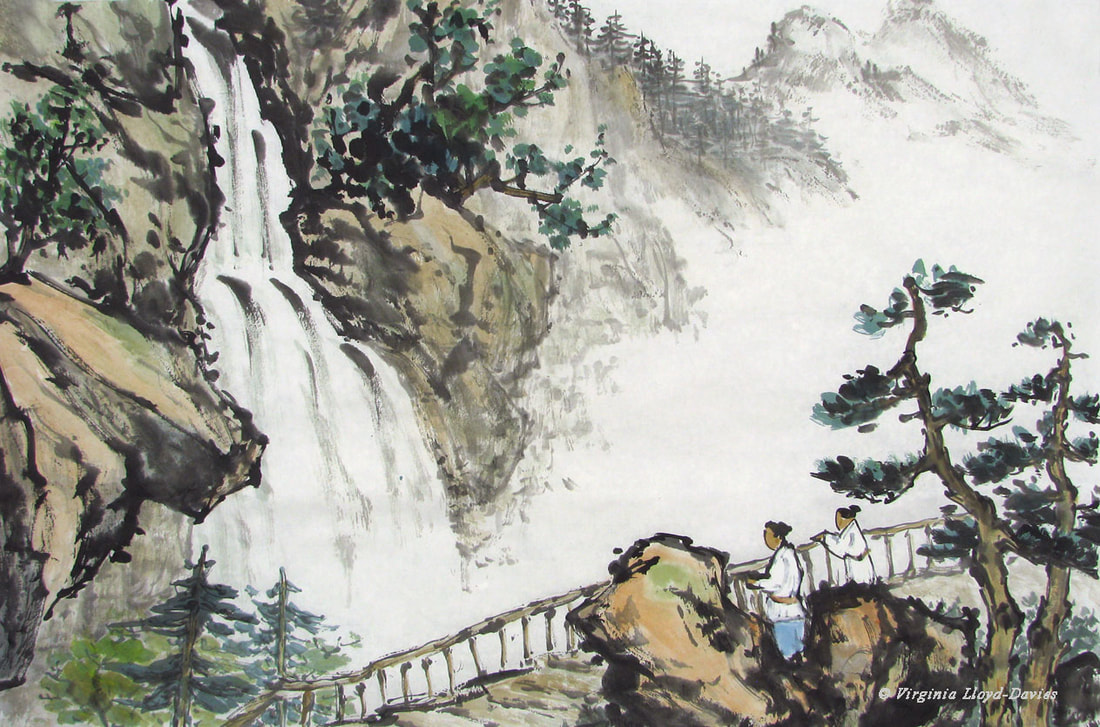
Step 7: Adding More Contrast to the Distant Trees

The trees and mountains in distance all looked the same shade of grey, so I darkened a few of the trees on the left which makes them look closer and adds more gradation to the depth.
Splitting Hairs!

Sometimes you don't want your brush to come to a point. I decided my pines in the foreground needed more detail, so I added an impression of needles by splaying my Happy Dot brush (OAS) and dipping the tips in pure black. This way I don't have to paint every single needle.
Step 8: Adding Detail to the Foreground Pines

The pine trees are now bushier and more elaborate, which works for trees in the foreground.
Tip: As trees are further away, add less detail.
Tip: As trees are further away, add less detail.

Step 9: Admiring the Waterfall
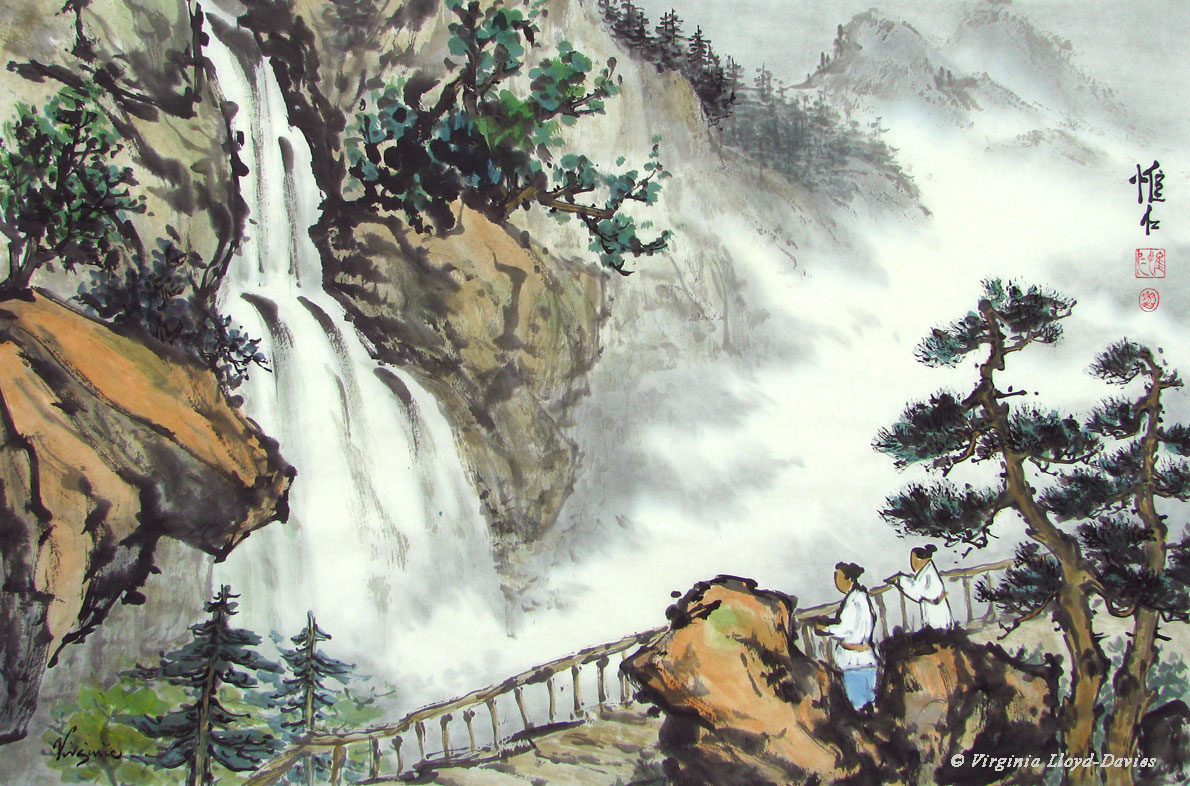
Admiring the Waterfall: completed painting. It measures 27"x 18" (69 cm x 45 cm).
Did you enjoy seeing how it developed? Did the breakdown step by step make it easier to understand? Do you have questions? If you painted it, it would turn out differently, and that's the delight of Chinese brush painting - because the composition is a living, breathing thing, your personality, thoughts and emotions will imbue the painting with your magic. Why not give it a try? You can follow along with these photos as you paint. Have fun splashing in the ink!
Did you enjoy seeing how it developed? Did the breakdown step by step make it easier to understand? Do you have questions? If you painted it, it would turn out differently, and that's the delight of Chinese brush painting - because the composition is a living, breathing thing, your personality, thoughts and emotions will imbue the painting with your magic. Why not give it a try? You can follow along with these photos as you paint. Have fun splashing in the ink!