- Published on

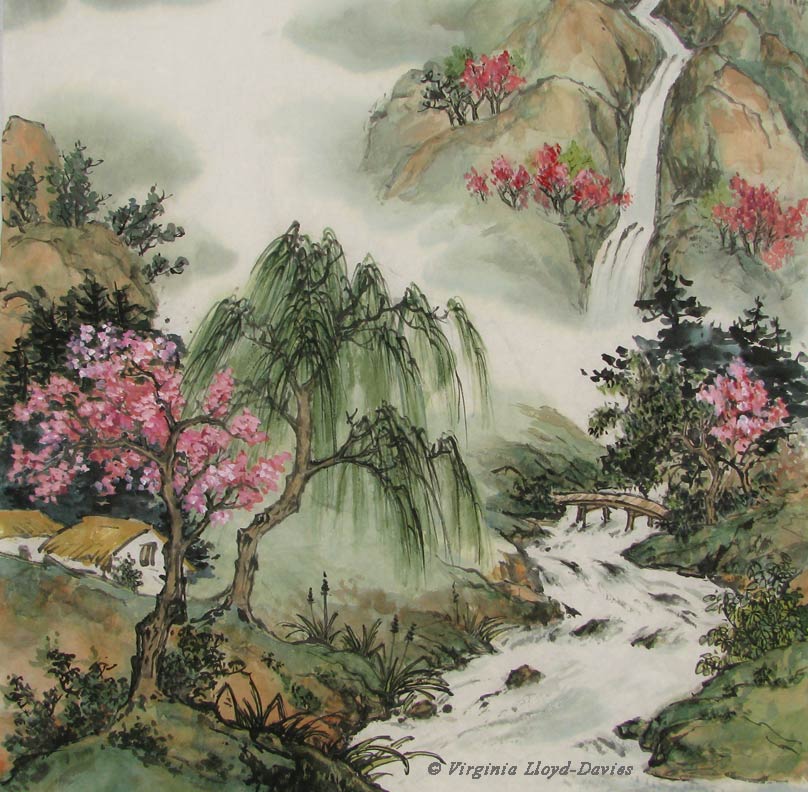
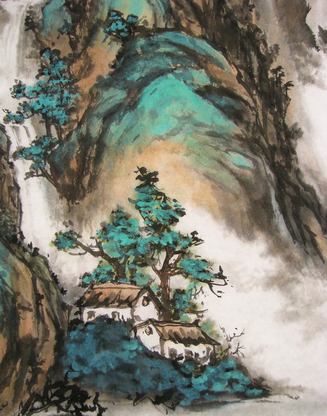
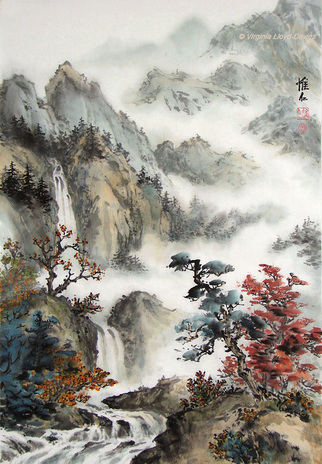
Springtime in the Mountains
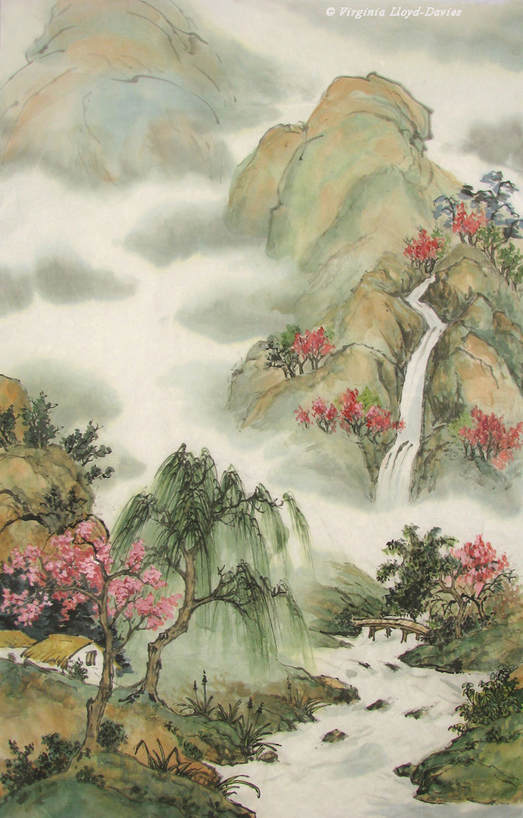

Areas to Work On
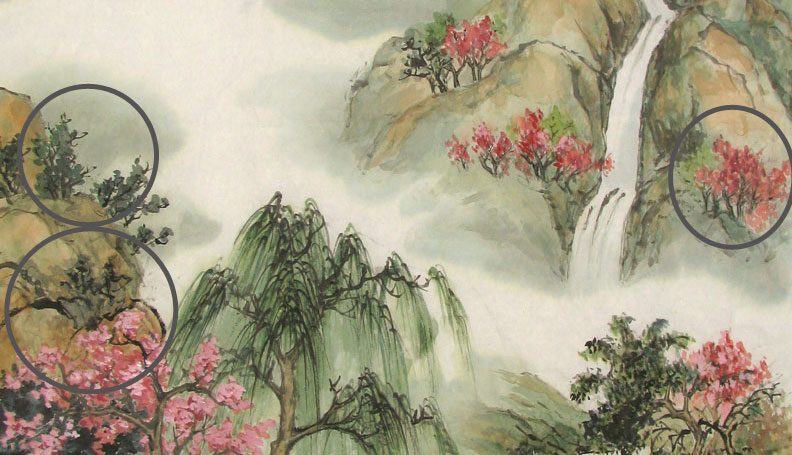
Pines Added on Left and Right

- Published on

Black Ink Sketch on Mulberry Paper
Completed Black Ink Sketch


First Layer of Color


Second Layer of Color
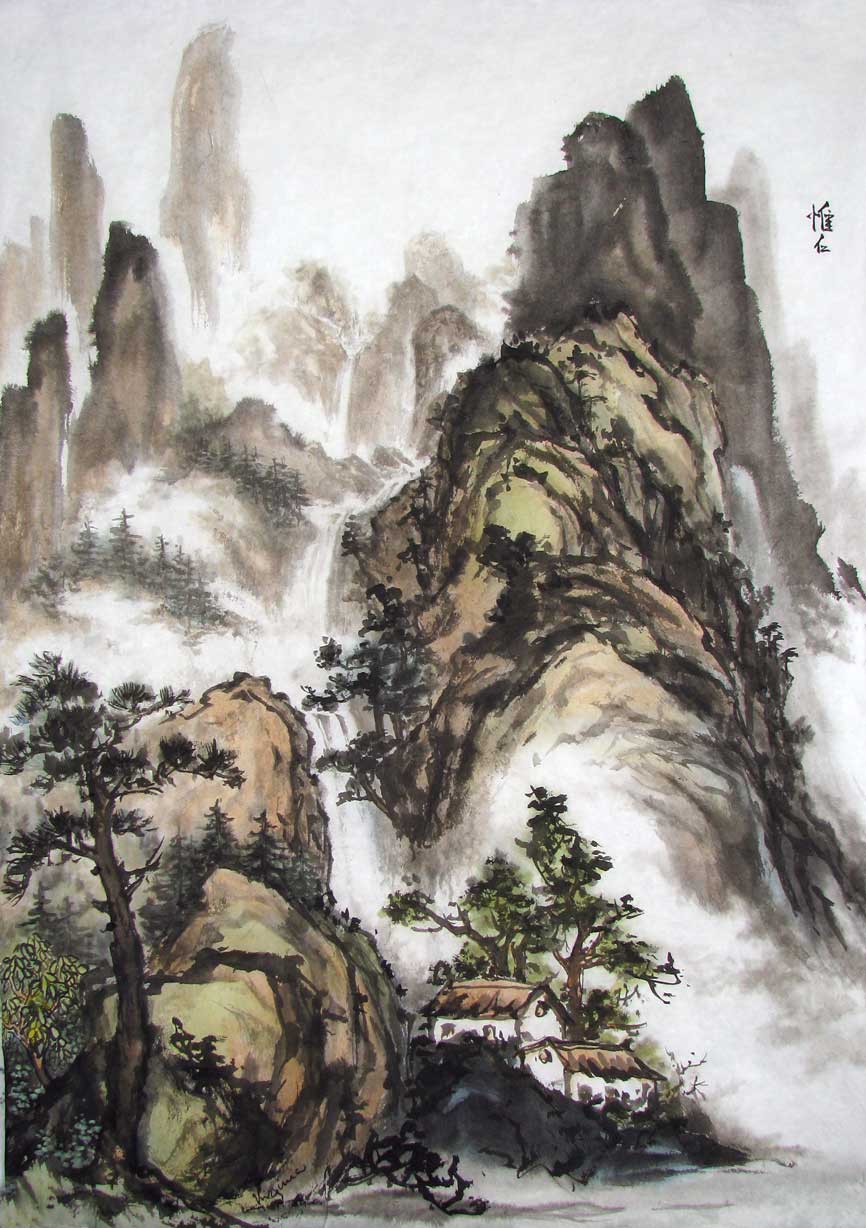

Third Layer of Color

Mountain & Houses in light colors
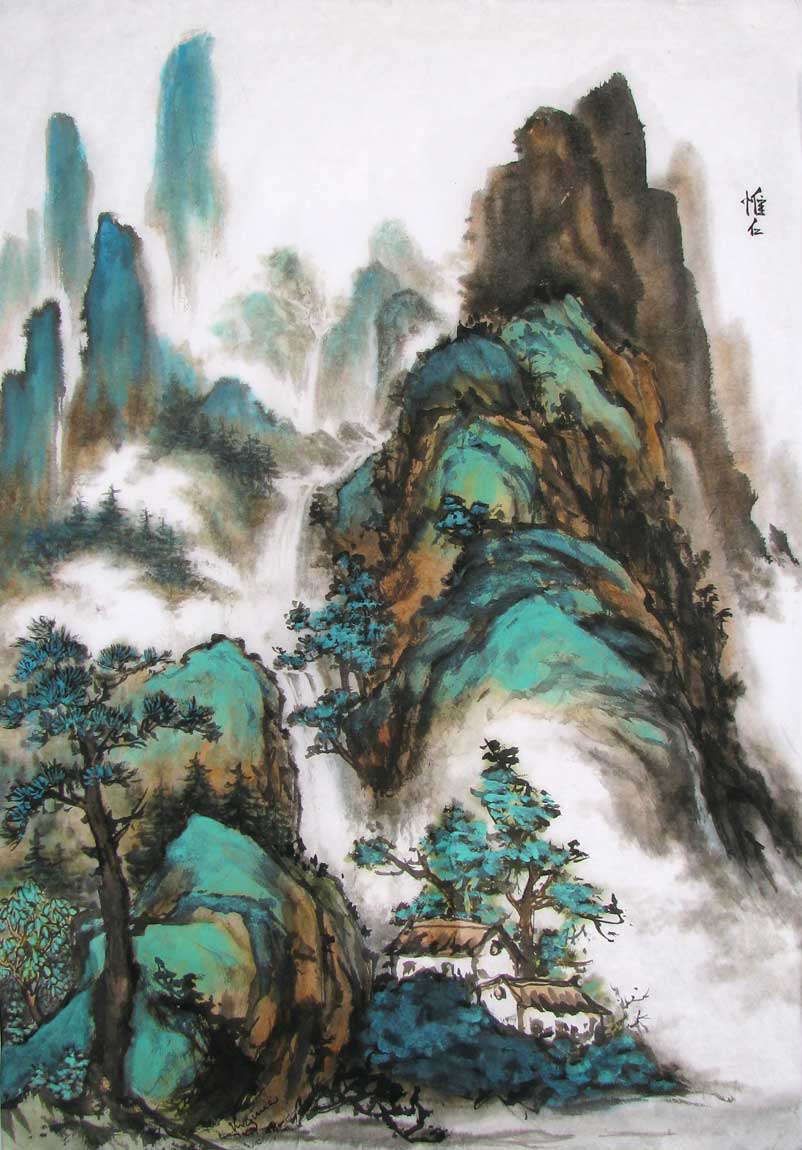
Mountain & Houses in Mineral Colors

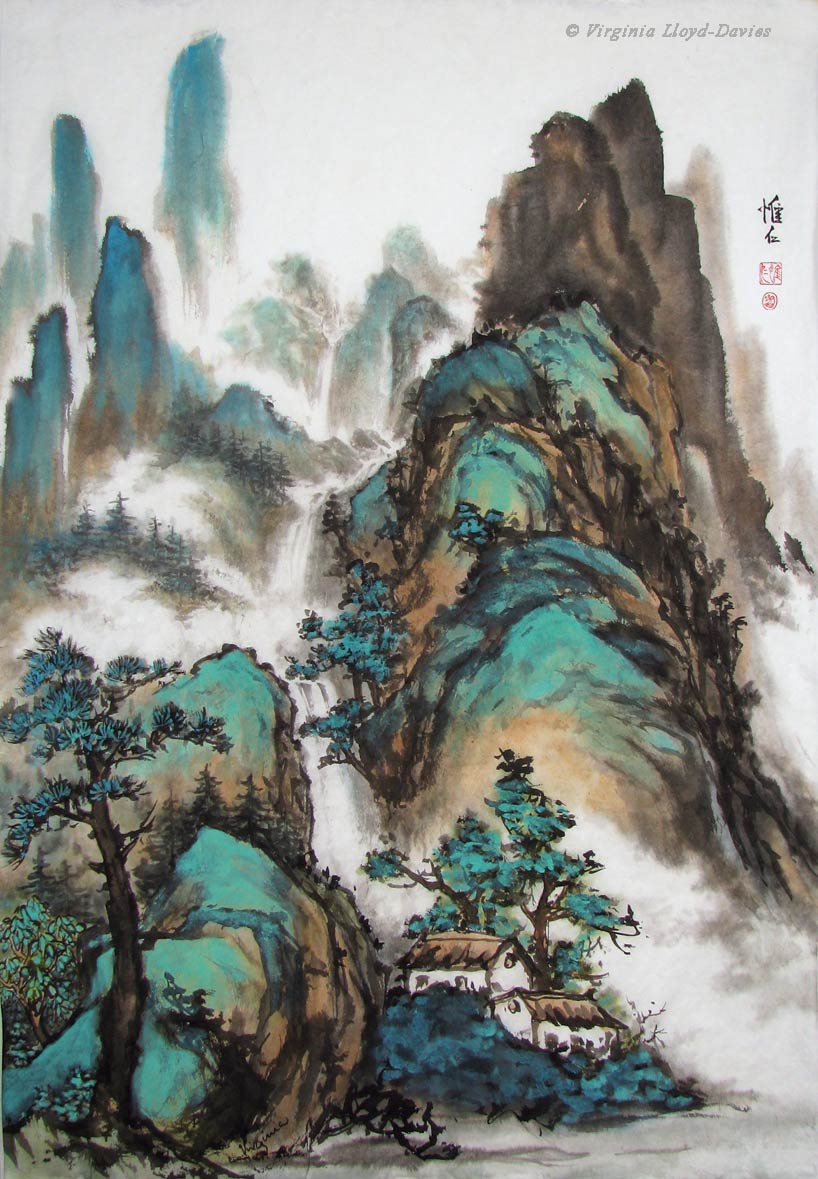
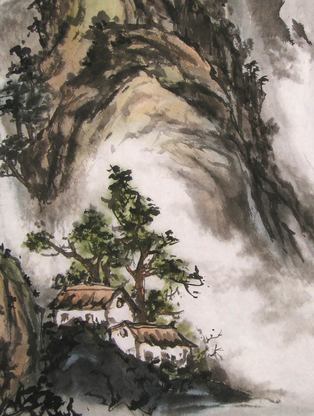
Cosy Cabins in the Mountains

- Published on
How did I get here?

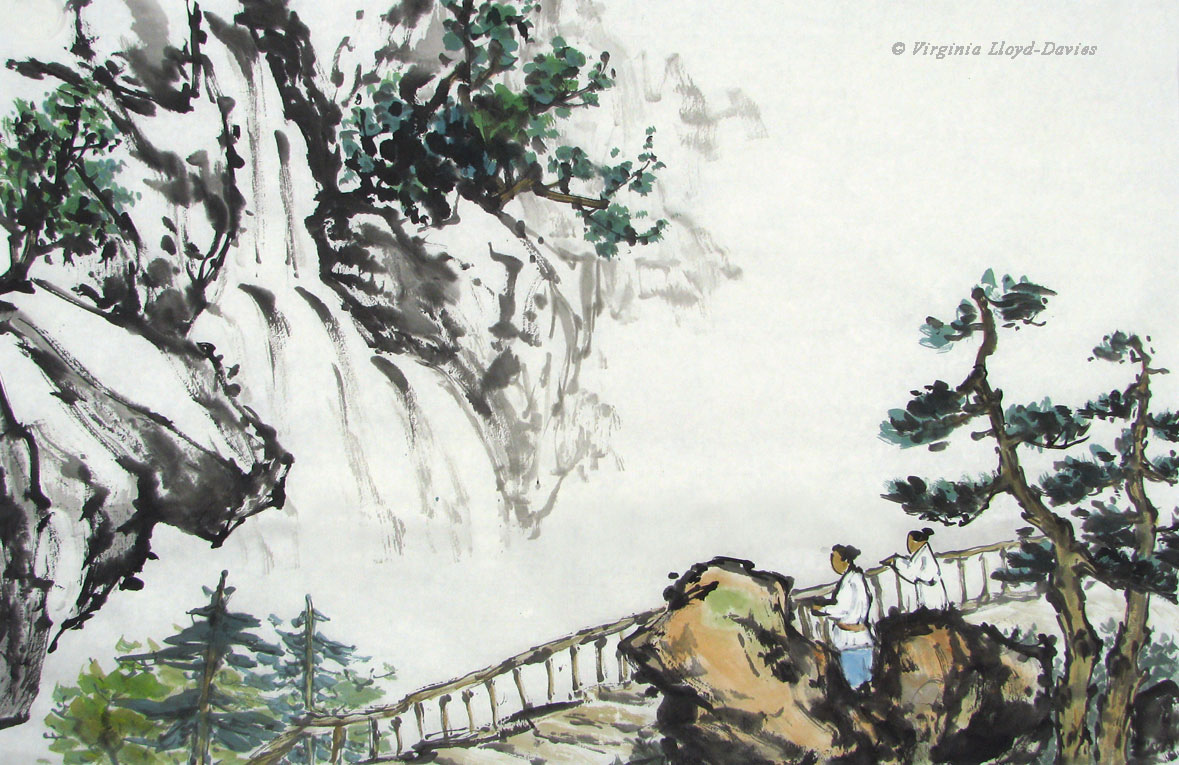
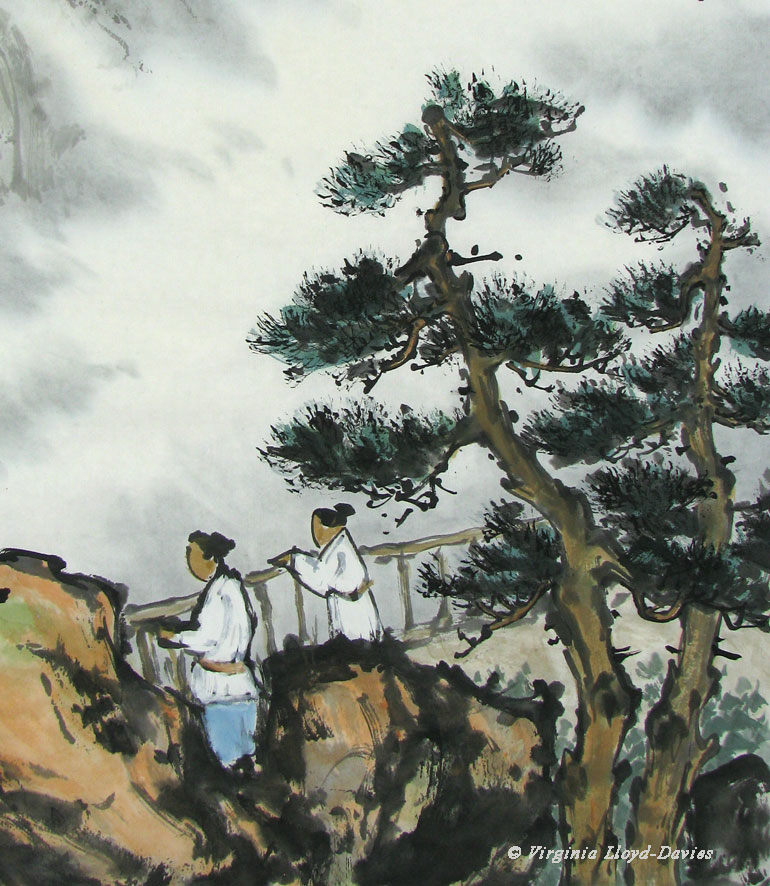
Admiring the Waterfall

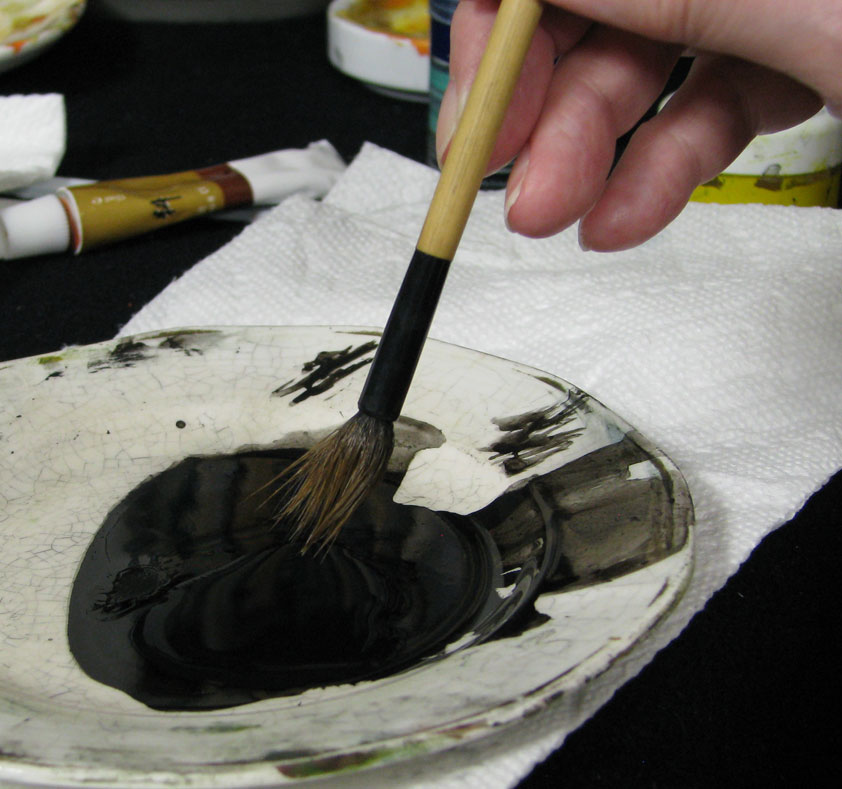
Tip: It's always a good idea to keep a scrap of practice paper next to your ink so you can check the color and the amount of moisture on your brush before touching your painting.

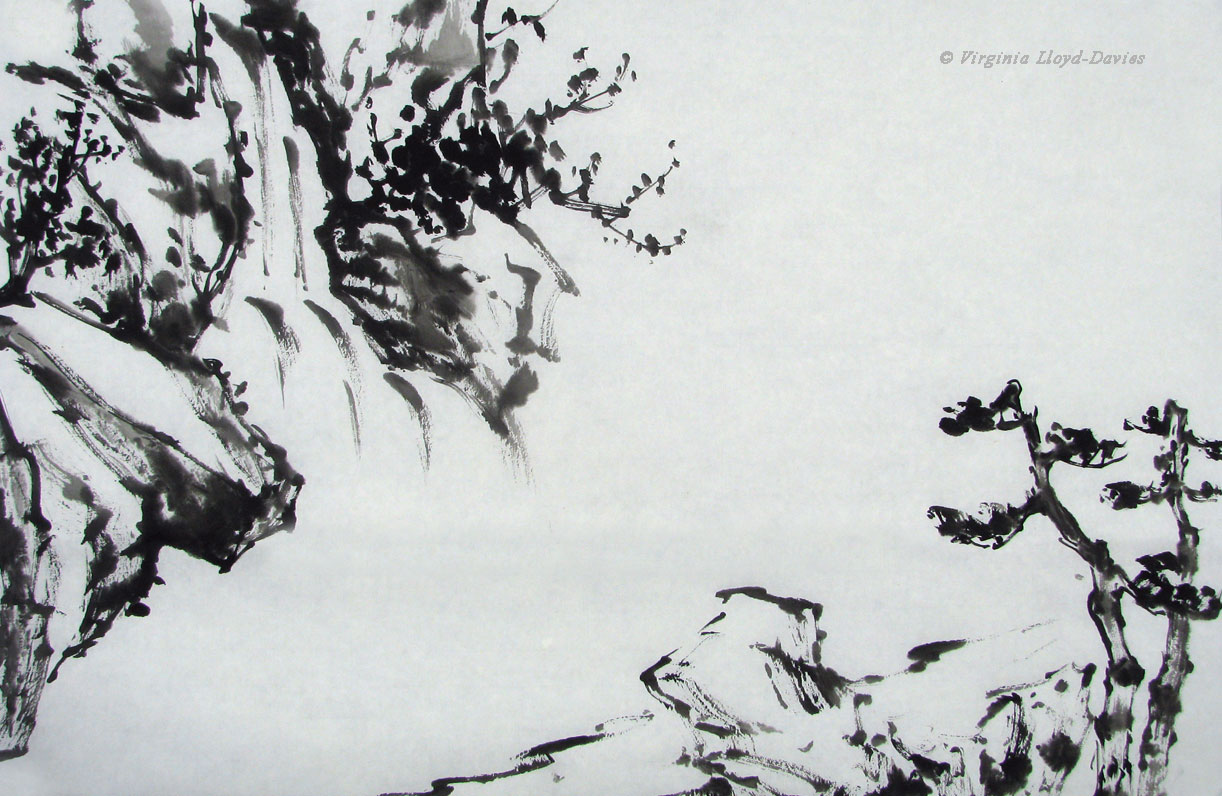
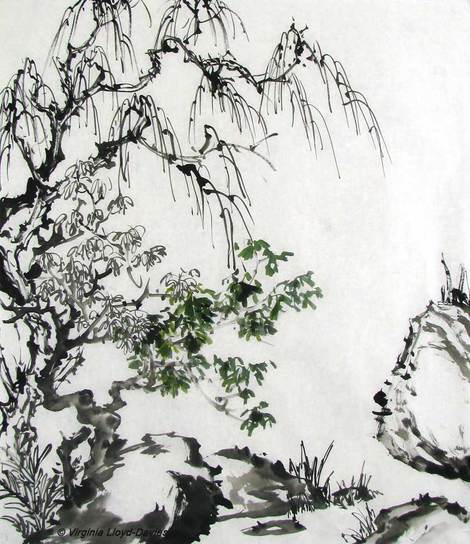
Step 1: Black Ink Sketch of Waterfall


Step 2: Add Foreground Trees & Rocks
Tip: Avoid having anything begin or end right in the corner!
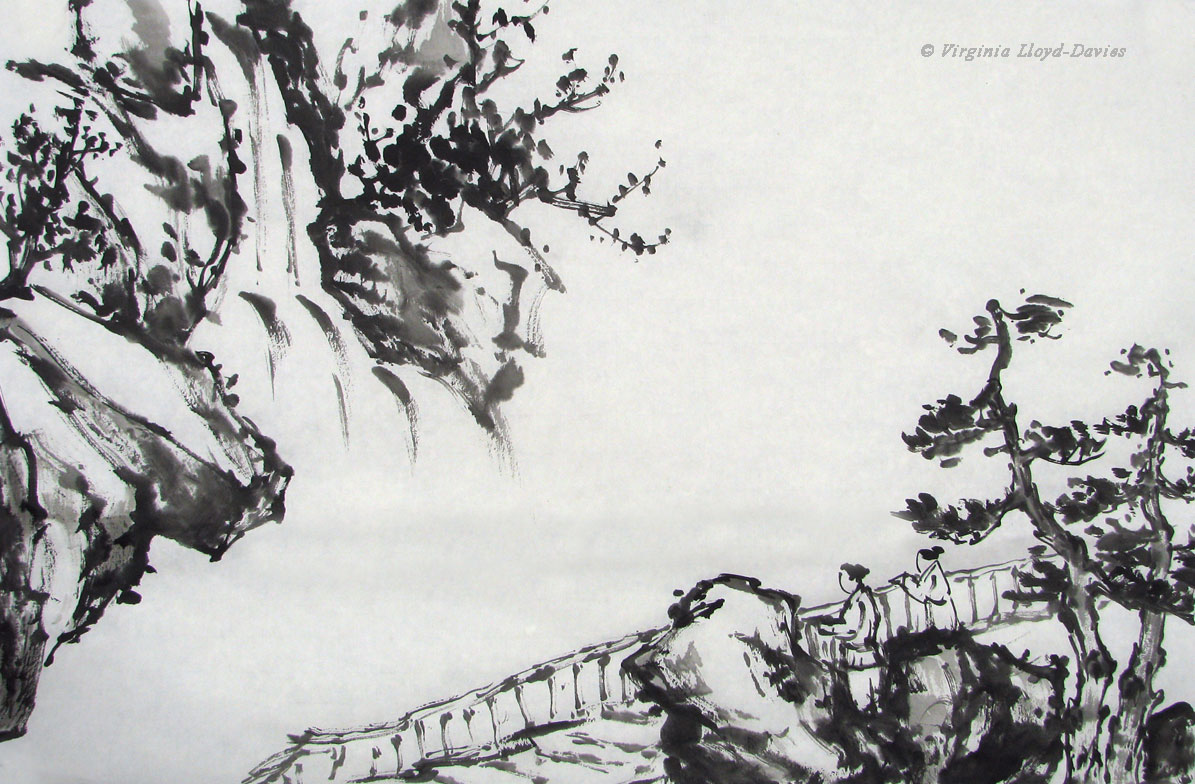
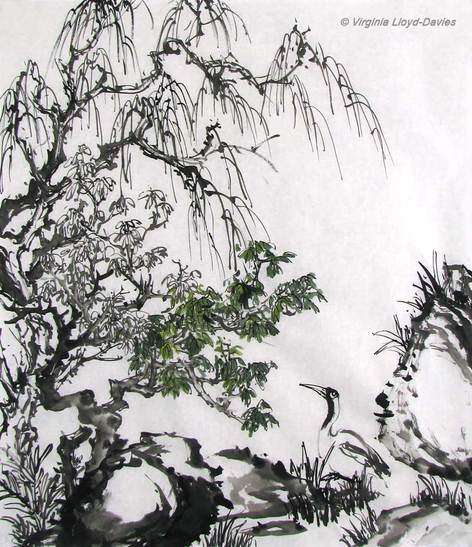
Step 3: Add People and Railing

Tip: Switch to a smaller brush for figures (I used my Happy Dot brush from OAS). If you're not sure what size to paint the figures, try them out on a separate piece of paper and place it under your painting to see if it looks right. Keep trying until it looks good. If I had followed my own advice, I might not have needed to stick in the rock!

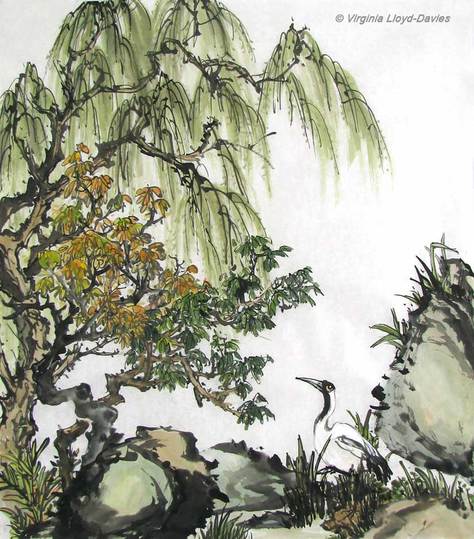
Step 4: Start Coloring

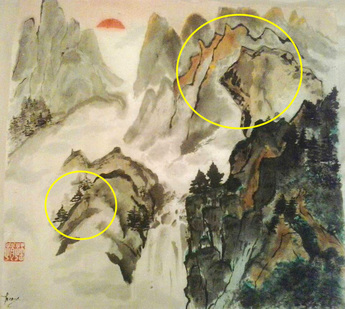
Step 5: Mountains Complete the Bones of the Composition
Next I need to create the mist, and for this I will take the painting off the easel.

Step 6: Creating the Mist

Tip: take into account, when you are mixing your color, that it will dry much lighter, especially when added to the back of the paper. Of course, if it is too light after it dries, you can do another wash.
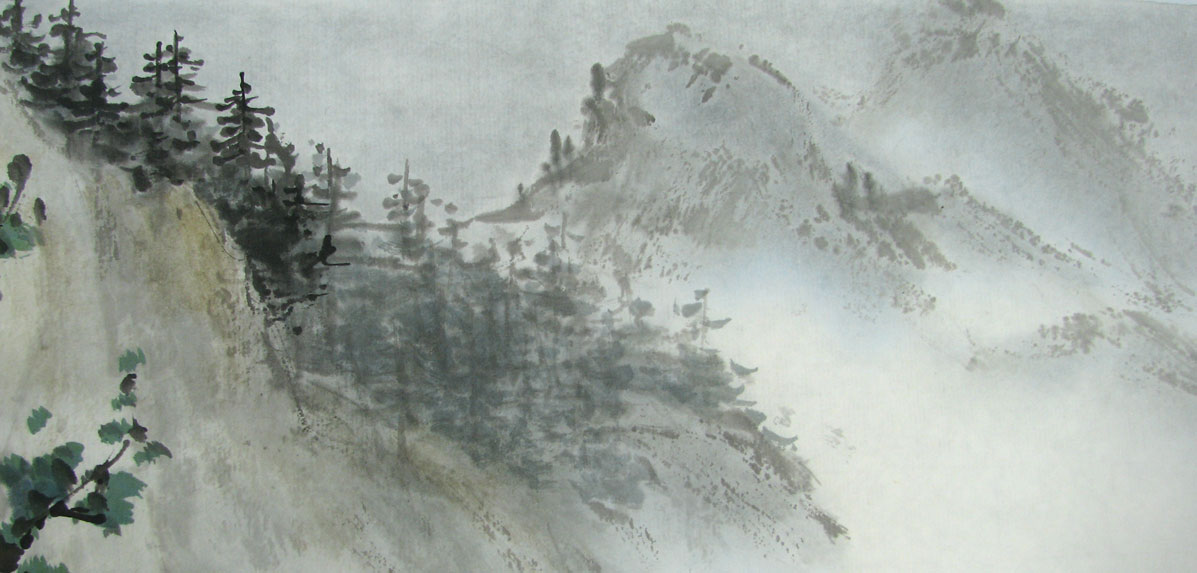
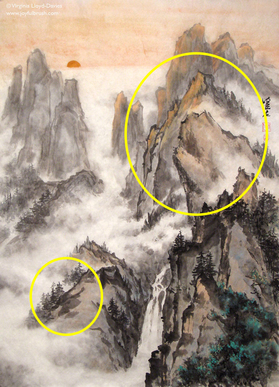
Step 7: Adding More Contrast to the Distant Trees

Splitting Hairs!

Step 8: Adding Detail to the Foreground Pines

Tip: As trees are further away, add less detail.

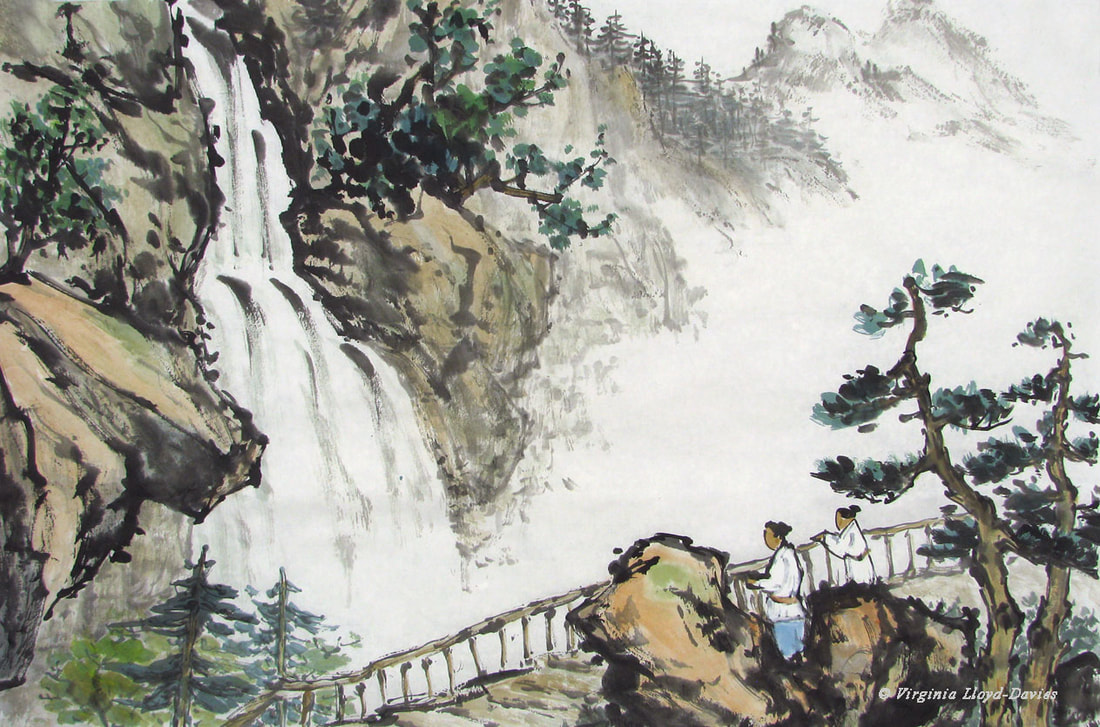
Step 9: Admiring the Waterfall
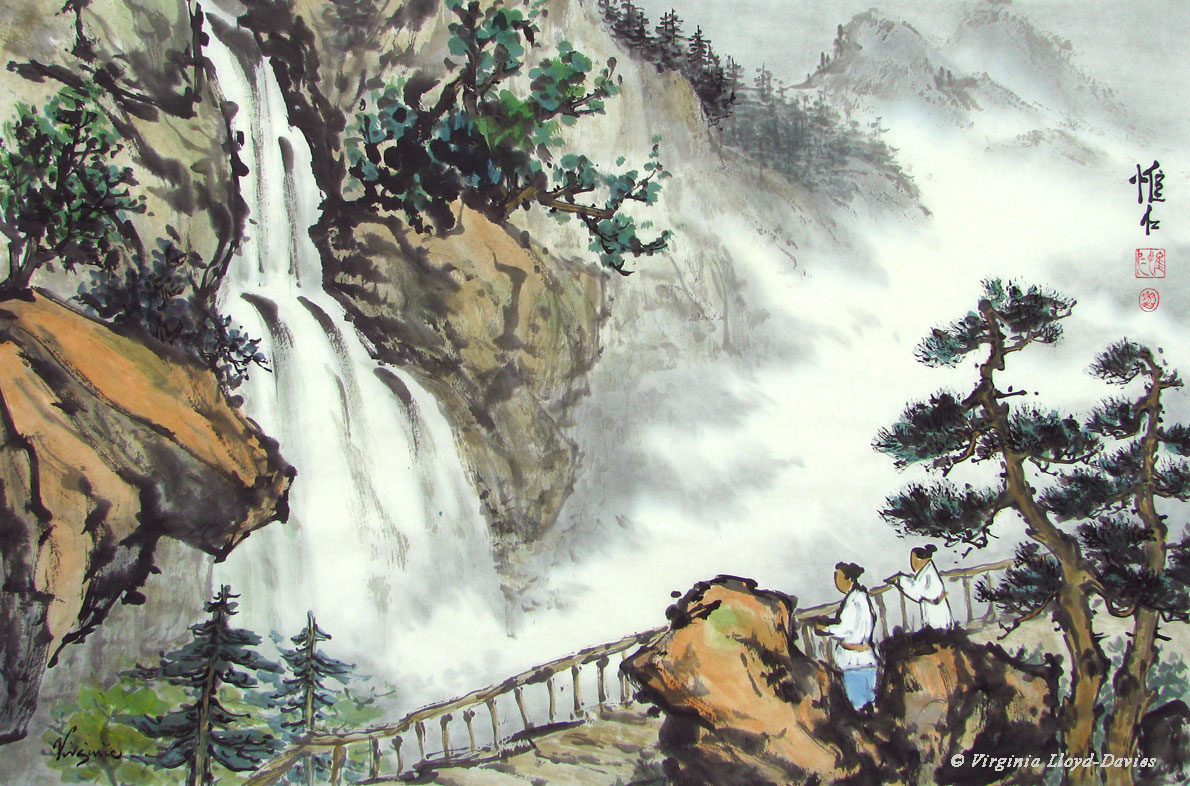
Did you enjoy seeing how it developed? Did the breakdown step by step make it easier to understand? Do you have questions? If you painted it, it would turn out differently, and that's the delight of Chinese brush painting - because the composition is a living, breathing thing, your personality, thoughts and emotions will imbue the painting with your magic. Why not give it a try? You can follow along with these photos as you paint. Have fun splashing in the ink!
- Published on
- Published on
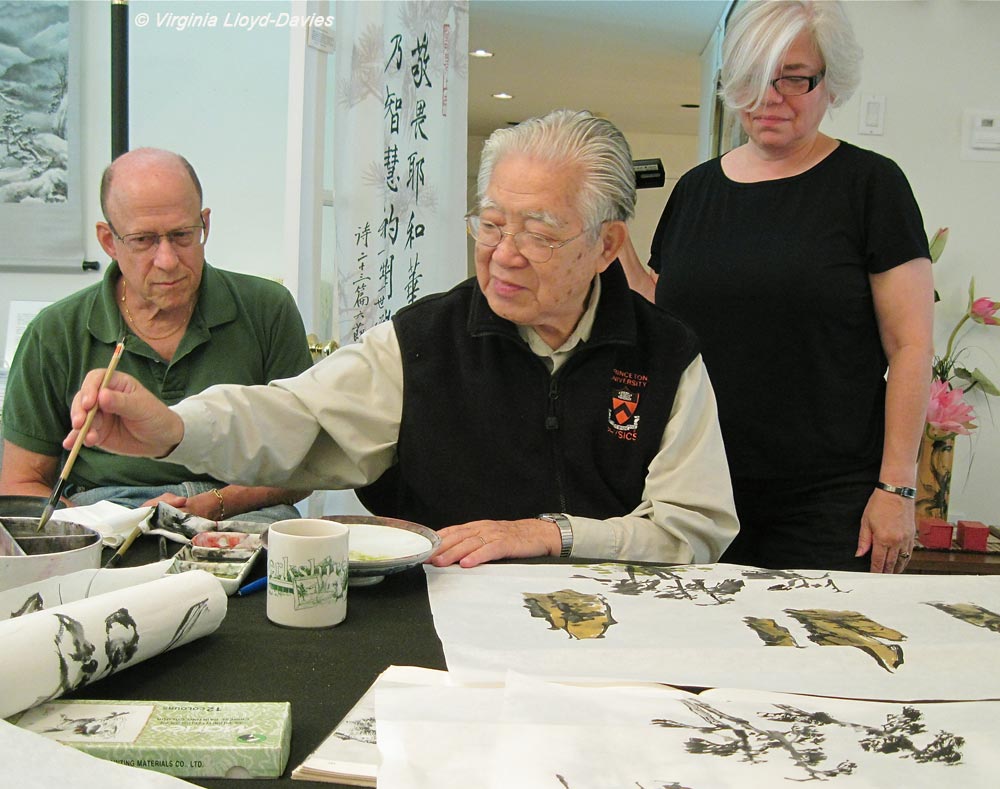
Prof I-Hsiung Ju demonstrates pine trees

Tips for painting your own pine trees:
- Start with light grey on the brush and paint the main trunks and branches. Keep the brush perpendicular to the paper
- Avoid making the trunks rigidly upright and parallel like soldiers
- Add strong black to the brush and create needle groups above the branches, using the side of the brush
- Add outline strokes to the trunks in black, but without making the lines continuous like a cut-out
- Add small branches to unify the groups of needles in black ink
- Keep your brush pretty dry throughout the painting process
- Don't overwork them!
Why not try painting some pine trees now? With courage and a good brush, you can do it!

Hoodoos & Pine Trees by I-Hsiung Ju (wash added later)

- Published on
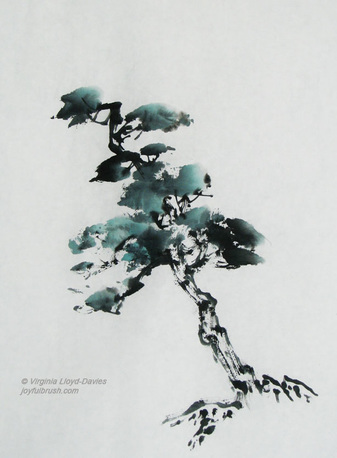
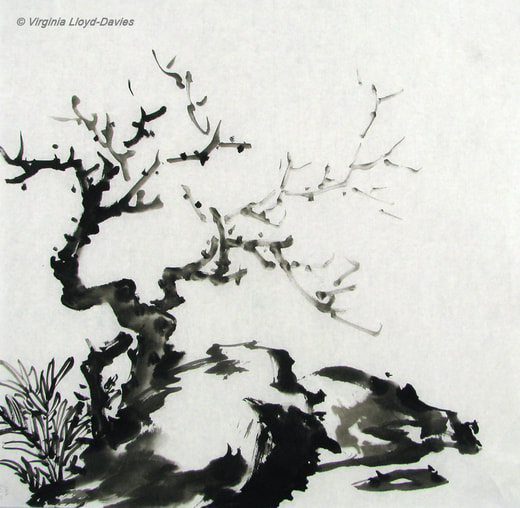
The Tree that Started it All

Mountain Meditation - completed
- Published on
Landscape by Tereza Mitry

Wolf Howls at Sundown by Virginia Lloyd-Davies

- Published on
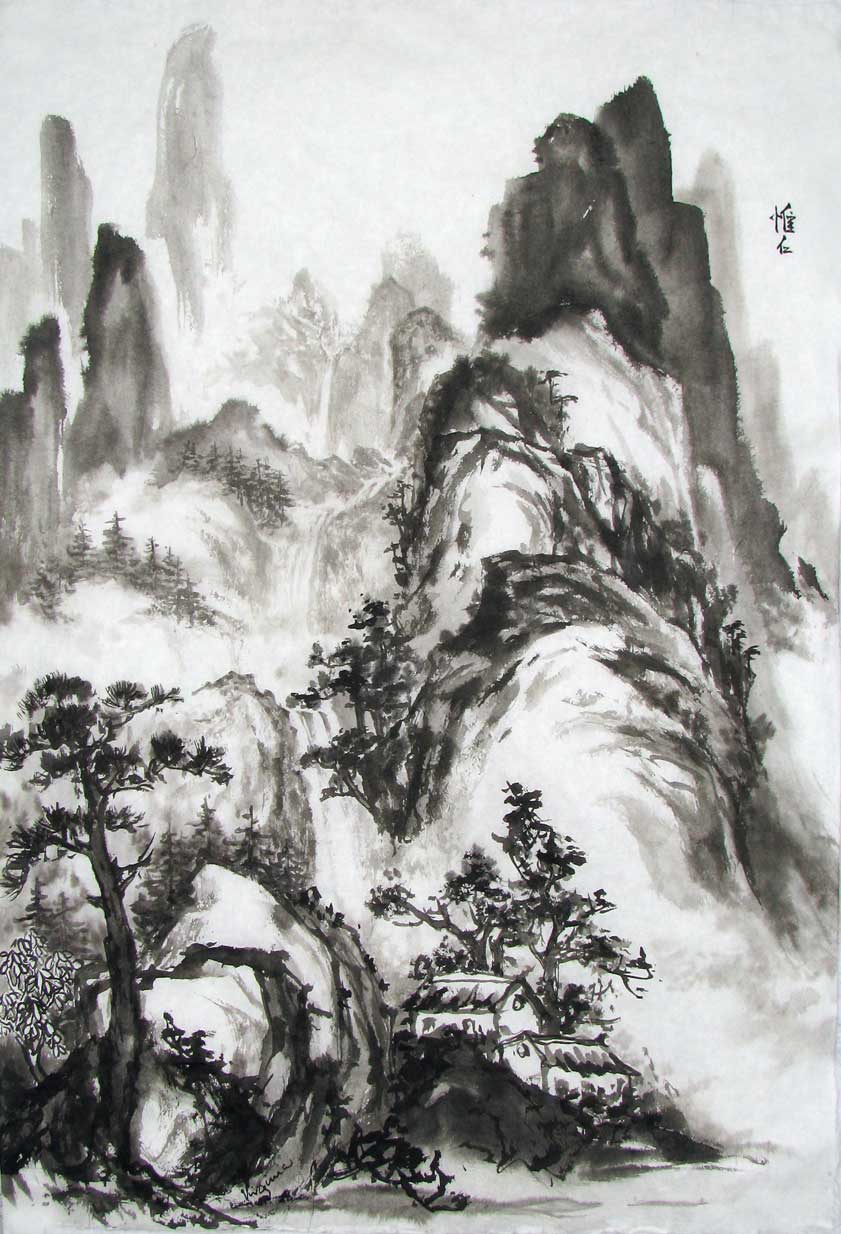
One of the obvious benefits to Western watercolors, then, is that you can change elements of your painting if you decide you need to alter your composition. But what if you want to keep your composition just the way it is, but change the overall hue? This is where Chinese brush painting excels. Take a look at this little misty mountain landscape I painted recently, using just tones of black and grey ink.
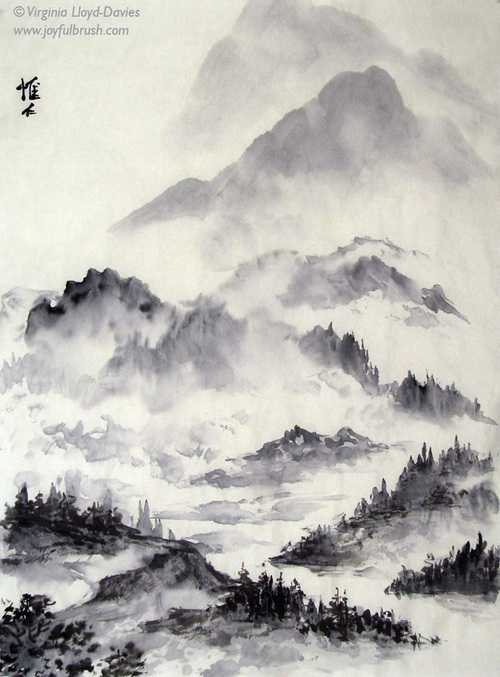
Misty Mountain Landscape
- Published on
The paper is a thin, raw xuan (unsized rice paper) and I am using a mixture of ground Chinese ink and liquid Chinese ink.
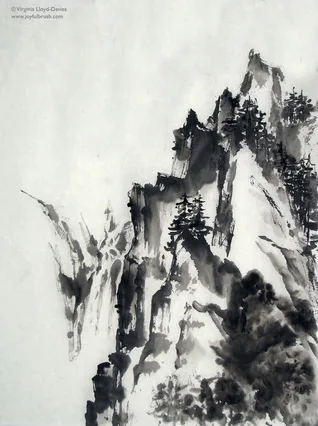
Tip: your landscape needs to grow in a zig-zag fashion. Avoid horizontal steps up the paper. Go for diagonals in your composition.