- Published on

Simple Sumi-e Bird
Introduction: What is Sumi-e? Sumi-e (ink wash painting from Japan) and Chinese brush painting are based on Asian calligraphy. Subjects are painted with simple strokes, using the tip or the side of the brush.
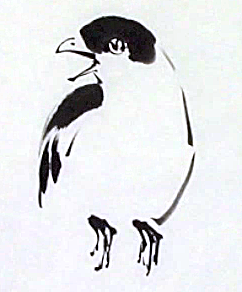
Here's How: Watch the video and follow the 7 simple steps to create this bird. You will need bottled Chinese ink, a small pointed Chinese brush and a selection of colors of your choice. Absorbent Xuan "rice" paper or newsprint works best.
Here's How: Watch the video and follow the 7 simple steps to create this bird. You will need bottled Chinese ink, a small pointed Chinese brush and a selection of colors of your choice. Absorbent Xuan "rice" paper or newsprint works best.
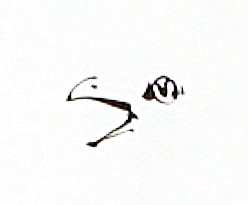
1. The beak and eye: These features establish your bird's personality and the relative size of your bird. Use strong black ink and a pointed brush and hold the brush vertically. Use the tip and paint boldly. Make sure the eye is higher than the midline of the beak:

Sumi-e Bird Beak and Eye
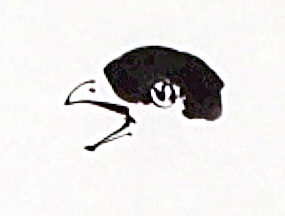
2. The head: This can either be a "volume" stroke painted with the side of the brush, or an "outline" stroke using the tip of the brush. This is a volume stroke:

Add volume stroke to the head
3. The shoulder and belly: Picture an oval egg for the bird's body. Decide which way it is facing - do we see the back? The side? The front? Do we see a bit of shoulder and wing? You can sketch it in with charcoal to get the size right. If the bird is facing front and sitting on a branch as this one is, then leave space for the branch:
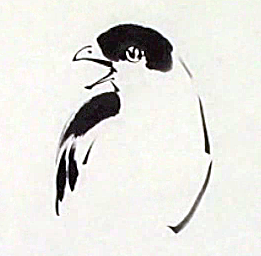
Bird Shoulder and Belly

4. The feet: You can paint in the branch lightly once you have painted the belly, or you can paint in the feet and then add the branch. In this case I painted the feet before the branch:
Sitting Bird Showing Feet

5. Sitting the bird on the branch: Remember that the wings will fold over the bird's back, so they will not hang down in front of the branch. In this case I painted an outline branch, but you could paint it with a volume stroke:
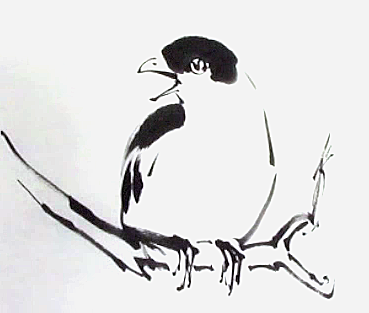
Top Half of Perching Sumi-e Bird

5. Positioning the tail: Add the tail, showing mostly the underside in gray, which will be lighter than the top black feathers. Tip: The tail might extend straight down if the bird is square on to the viewer, or it might go off to the side if the bird is slightly turned, as this one is:
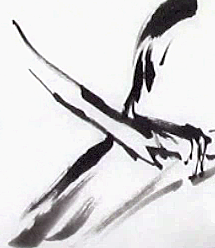
Bird Tail

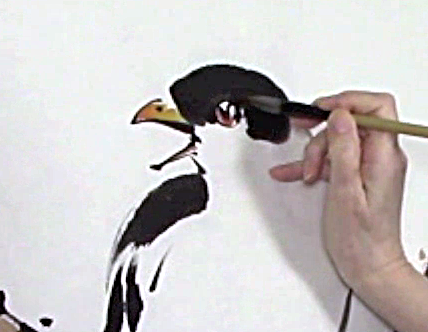
6. Color: Add color to the beak and eye of the bird, and color in the branch. A few dots can indicate leaves. Choose whatever colors you like:

Closeup of the bird's head
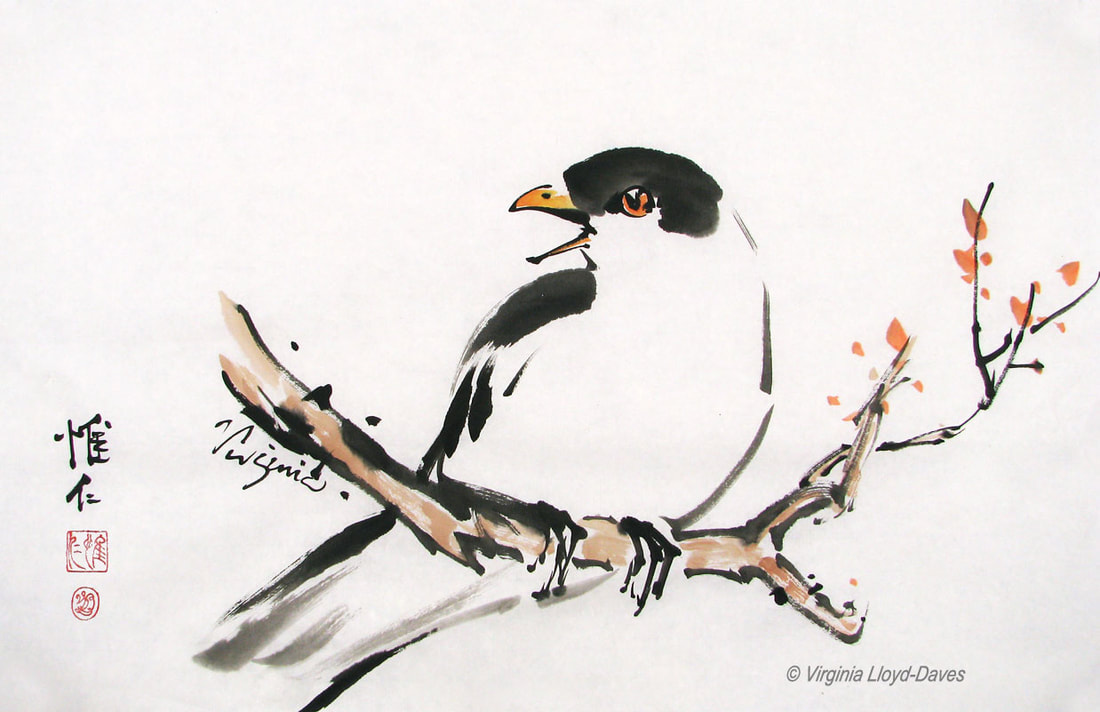
7. Adding detail: Develop your painting to show the elements surrounding the bird. This could be more branches, leaves or flowers. Remember that the bird is your focal point, so don't over-develop the lesser elements. The negative space (the empty, unpainted area) is what gives prominence to your bird. Sign your masterpiece and congratulate yourself on a job well done!
Next steps: Browse through my blog posts to find more easy birds to try: lesson on beaks and eyes; mini-tutorial with video on painting two birds on a branch. Look through my painting galleries to get inspirations for more paintings. Have fun!
Send me questions in the comments section. I'm always happy to help!
Send me questions in the comments section. I'm always happy to help!
Would you consider the "space" inside the bird's belly as "negative" since it is not being filled or shaded and since the belly is shown wit the outline stroke?