- Published on

Springtime in the Mountains
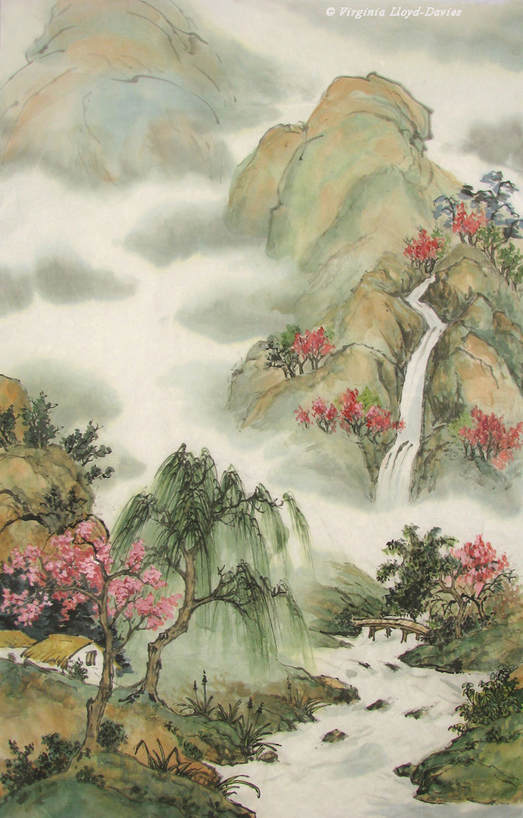
I painted this 18 years ago and I remember thinking I wanted it to be bubbly and springlike. I held on to it because I liked the airiness of the composition and some of the elements - the cabins, the willow and the bridge, for instance - but I knew I had problems with the waterfall and I positively hated my little 'bunches' of red trees. Clearly I had little idea of how to integrate rock and vegetation. It felt unfinished, but back then I didn't know how to progress the painting. I decided to see if I could 'fix' some of the problems as an exercise to train my eye to see alternative choices.

Areas to Work On
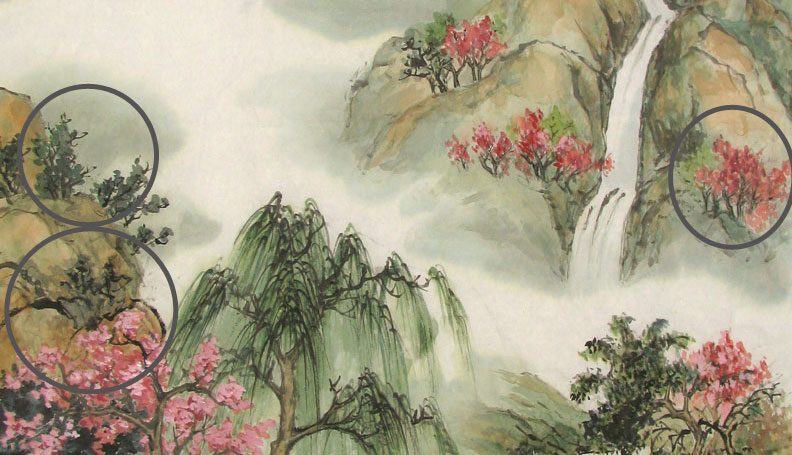
Here are some of the areas I decided to change. I will add more bluish-green pines on the left behind the flowering tree. My reason is to hide the nasty humpy black hill strokes (bottom left circle). Above them, I will make those trees on the left a bit bigger (second circle) because they are the same size as the nasty little red trees on the right and they need to be bigger because they are closer.
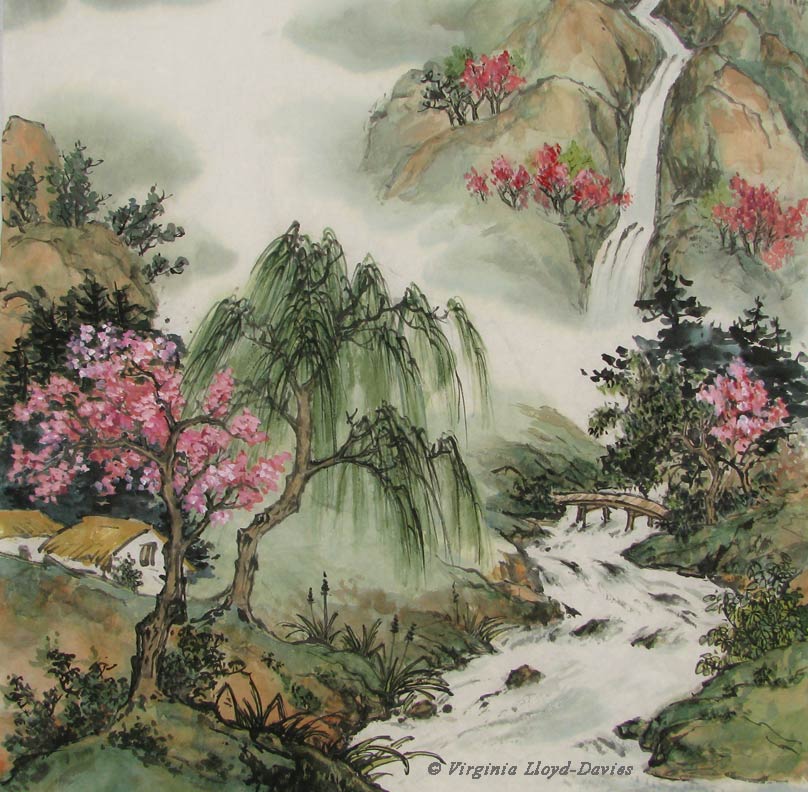
Pines Added on Left and Right

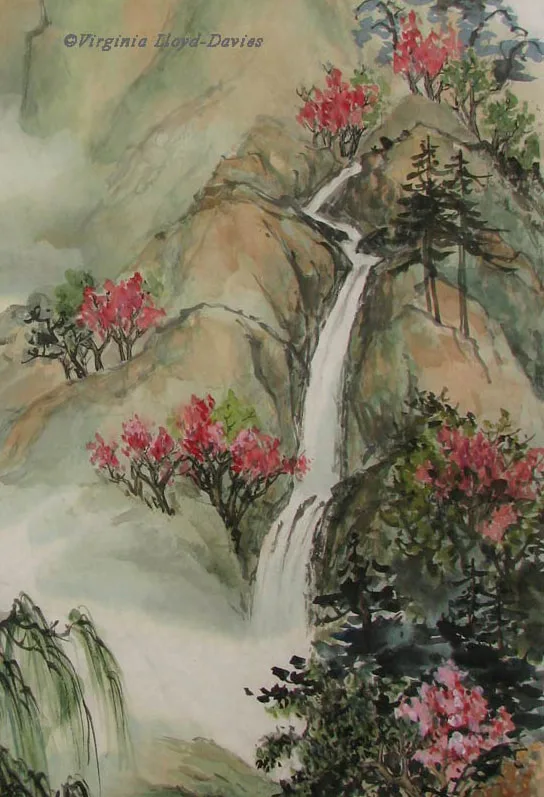
I'm still unsure of what to do with those wretched little red trees on the right. I have added some more pines below them which has helped to make the wretched reds recede a bit, but it has also cut off part of the layer of mist (that white band) which, in Chinese painting vocabulary is the equivalent of "....." meaning: there is more landscape between the two layers but the mist indicates that things are further back.

Medium Mixed Hair Brush
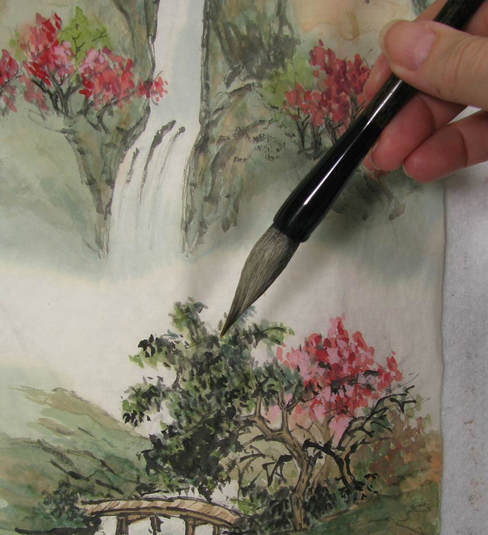
Here's the brush I used to make these corrections: it's a mixed hair which comes to a good point. I tried to match the size of the brush with whatever I used 18 years ago, but since I can't remember what brush I used last week, I basically had to guess.

Foreground now Joined with Waterfall
Living dangerously: I have added more trees on the right (lower circle) so that bunch of wretched reds is now subsumed in among green foliage. The downside of this action is that I have now completely lost the mist that indicated the distance between the bridge in the foreground and the rest of the vertical waterfall. Thinking about it in retrospect, I could have tried modifying the red trees with some opaque color such as brown or green, which might have made them less noticeable instead of joining the two areas. I am starting to feel like a card shark, trying to fool the viewer's eye.
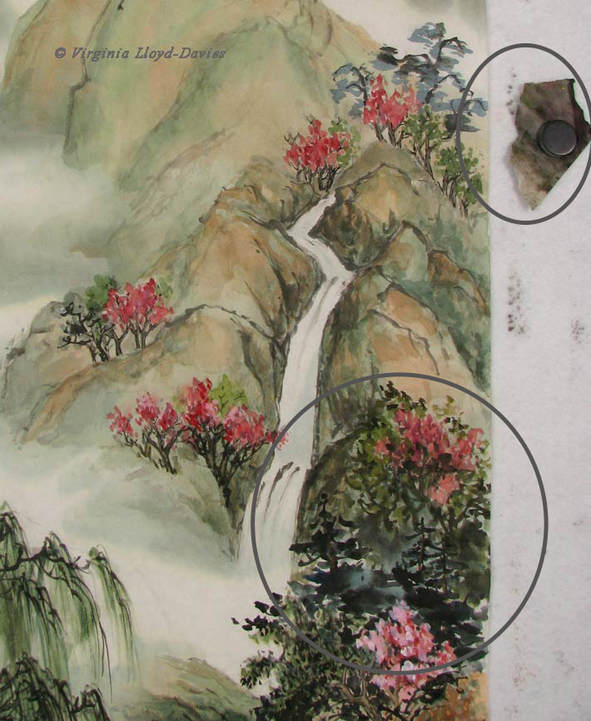
So now it's time to tackle the waterfall. It looks too big and too well-defined for the relative size of the trees. Since any change I make will be permanent and I haven't a clue which option to go for, I'm going to try a trick you may enjoy: that's what the magnet and a bit of colored scrap paper in the upper circle are for. Here's how it works in three different versions:
So now it's time to tackle the waterfall. It looks too big and too well-defined for the relative size of the trees. Since any change I make will be permanent and I haven't a clue which option to go for, I'm going to try a trick you may enjoy: that's what the magnet and a bit of colored scrap paper in the upper circle are for. Here's how it works in three different versions:
Masking Top Segments

1. What if I blocked off the top two segments of the waterfall? (see above)
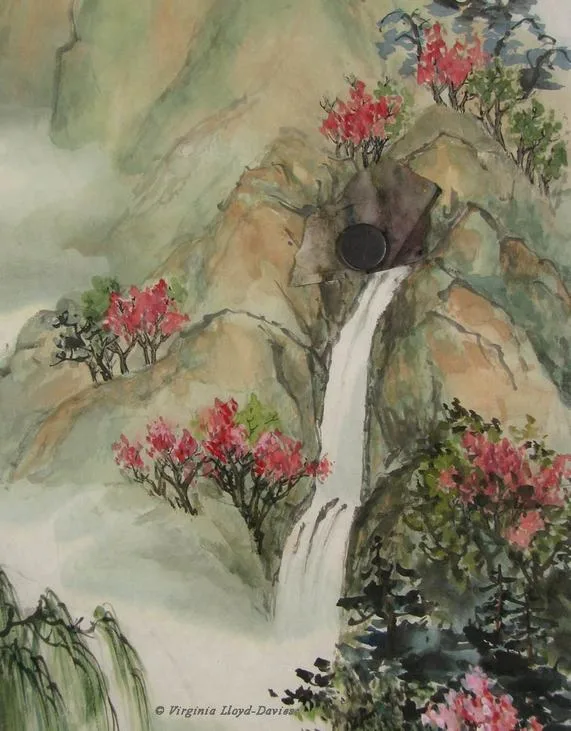
Narrowing the Waterfall

2. Or blocked off the top two segments and narrowed the two lower segments? (see above)

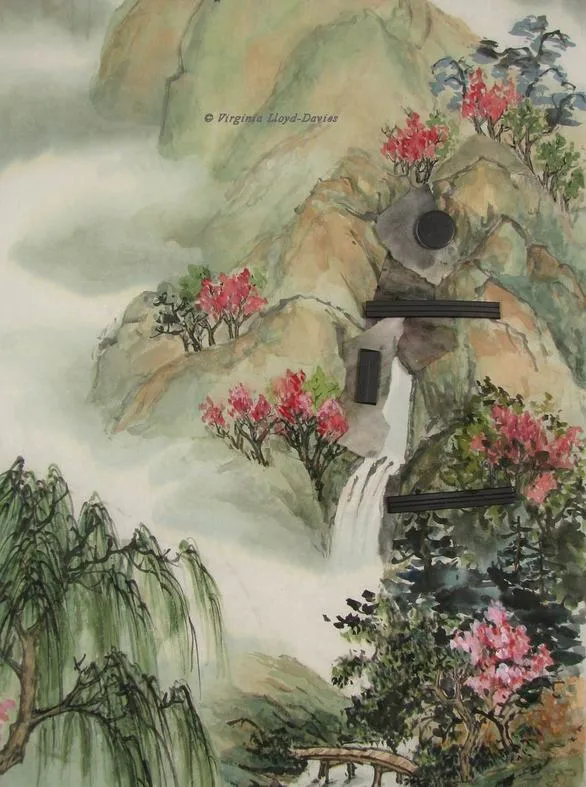
Waterfall Showing Full Length
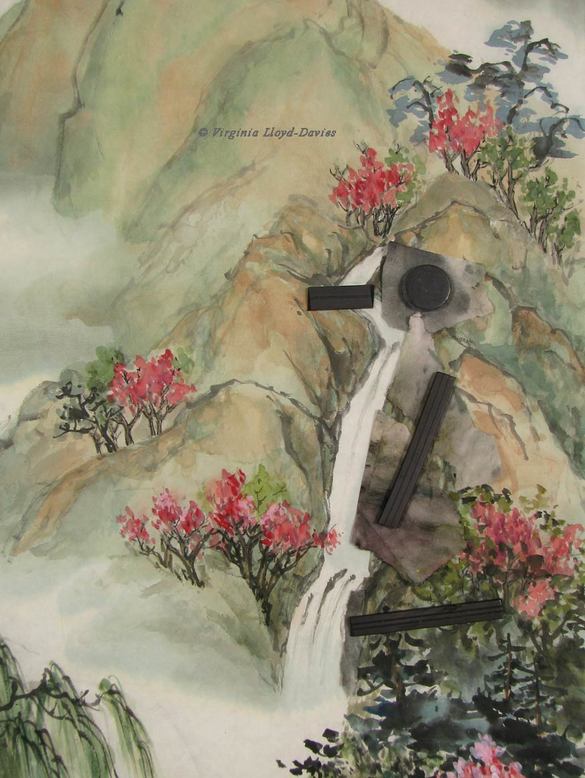
3. Or what if I kept the top two waterfall segments and narrowed everything down? (see above)
Waterfall Reworked
Aha! See: I've gone with version #3: the narrowed shape works better now, though I have to say it is perilous to retouch a waterfall. The original rock edges will still show a bit and brush blobs from too much wet and grey vie with harsh lines from too much black unless you're very careful. I've done my best to avoid doing solid lines and will add a little color when it's dry. My rocks are still too bare of vegetation. I have added two pines on the right to hide some unfortunate downward tumbling rocks. Next I will add some 'forest' (blurry tree-like strokes in the distance) as shown below:

Adding a Forest in Distance
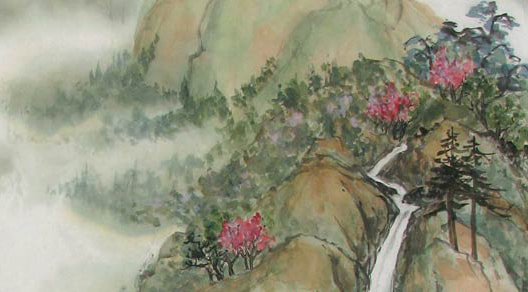
Adding the forest helps in several ways: it gives more texture to a barren rocky area, it incorporates the bluish trees top right, and it stretches the whole composition, which is stubbornly stuck to the right of the paper, and moves it more towards the center. My final fix is to do the wash again on the back of the paper in order to soften the mist. I lightly sprayed water to dampen the complete painting, then added light greyish green. Here it is below:

The Finished Painting with Mist Reworked
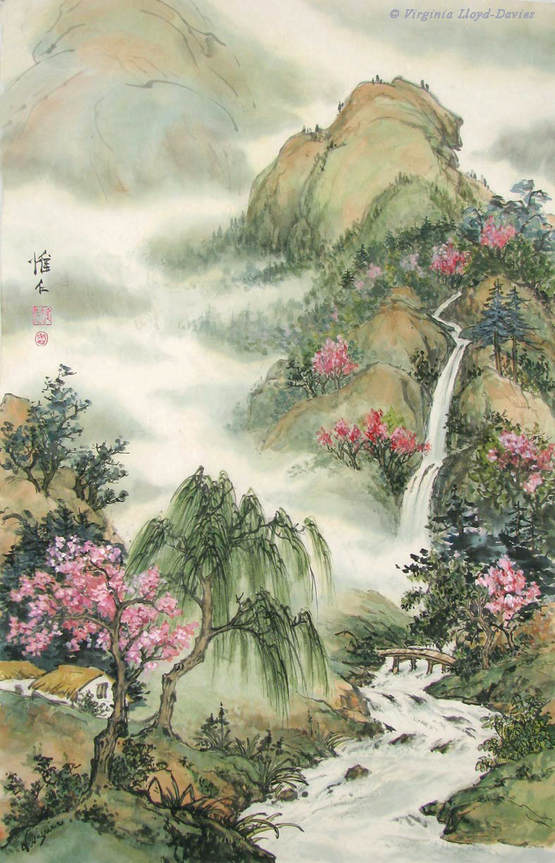
Hooray! This is my final version (I swear it!). Does the painting work now? Well, I think there were flaws in my original composition which could not be ameliorated and my solutions make the painting look a bit overworked. Could I have fixed things differently? No doubt, and you probably would have done it quite differently! Did I learn anything? Absolutely! If we are afraid to try something out because it may 'ruin the painting', we will always stay within our comfort zone and our paintings will become stale and predictable. Here's a slide show of the beginning and the end:


So I encourage you to live dangerously with your brush. After all, it's just a piece of paper. Does this exercise give you ideas? New insights? Let me know how you get on!
4 Comments
I like the way you described your process. It is a great help.
Thanks, Dennis!
I toggled back and forth several times, studying what you did. I do like the final version better.
Thanks, Suzanna! I think there were a bunch of options I could have tried, but we never know how it will look until we commit to one. I'm now thinking that if I had signed somewhere else (other than that spot on the left) and instead extended some 'fuzzy forest' in that heavy mist area on the left, it might have changed the weight of the painting still more. Ah, we'll never know! I have sworn I won't fiddle with it any more!