- Published on
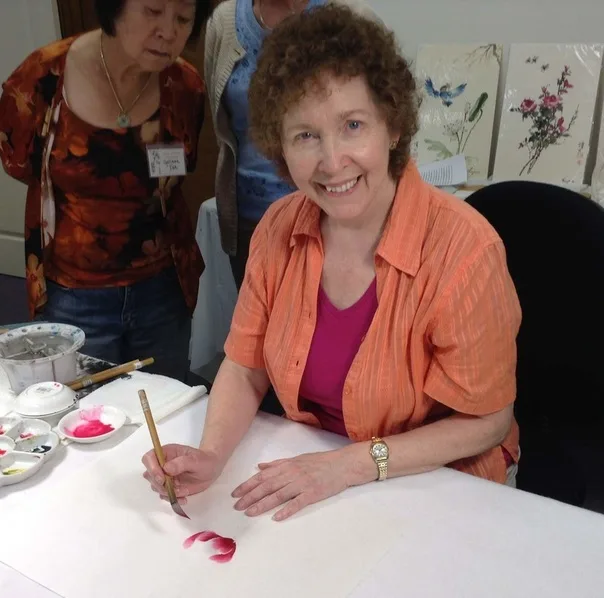
Demonstrating peony at The Villages Workshop in Florida

Step 1: Relax! You're going to have fun! Peonies come in many varieties and different colors and they're all delicious!
Select one or two colors for your flower: Marie's Rose and Rouge Tint work well, or Rose and Carmine. Apply the lighter color diluted to halfway up the brush; apply the darker color more strongly to the tip of your brush.
Tip: use a small, soft brush for the petals. Click here for more info on brushes and colors.
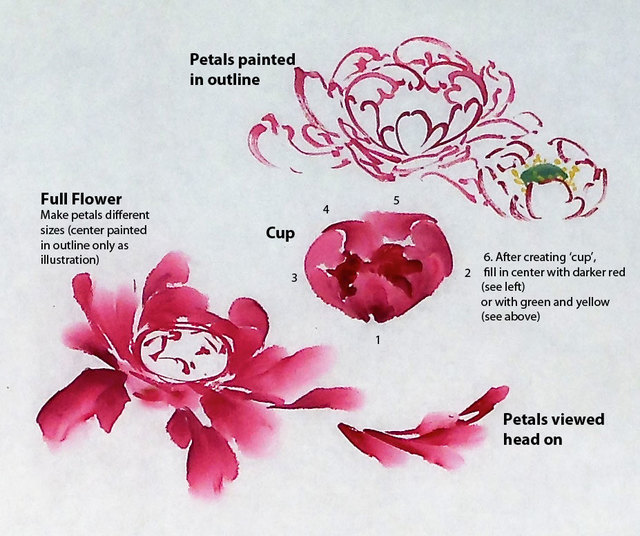
Peony Flower Construction

Step 2: This should give you some ideas on how the petals open: first a cup of inner petals and then one or two rings of outer petals. Tip: It's easy to get carried away with rings of petals, until the flower looks unwieldy and too big for the size of your paper. Want more color? Make two flowers!
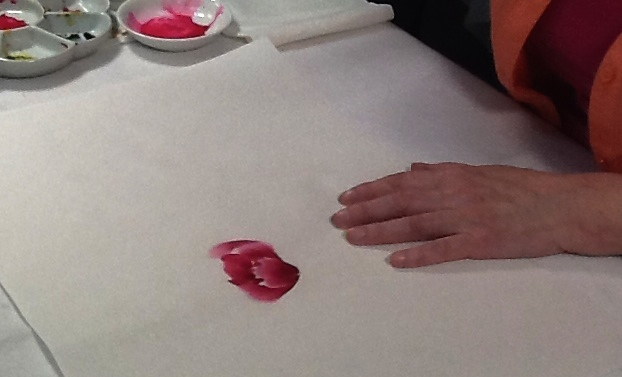
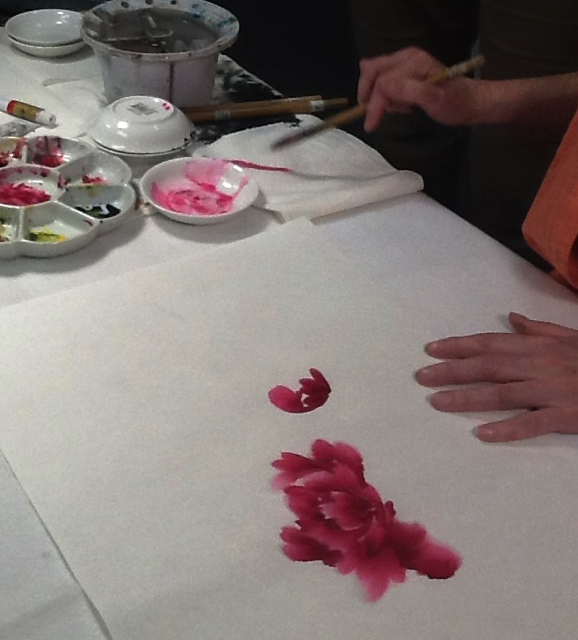
Step 3: With the brush handle slanting towards the paper (not perpendicular to the paper) and the tip pointing towards the bottom of the petal (towards you) create the near side of the inner cup of petals.
Tip: if you find your color spreading too much, dry your brush off on paper towel. Still too runny? Try using a thicker paper, such as double xuan. I am using a single raw xuan, but I've had lots of practice! Click here for more info on papers.

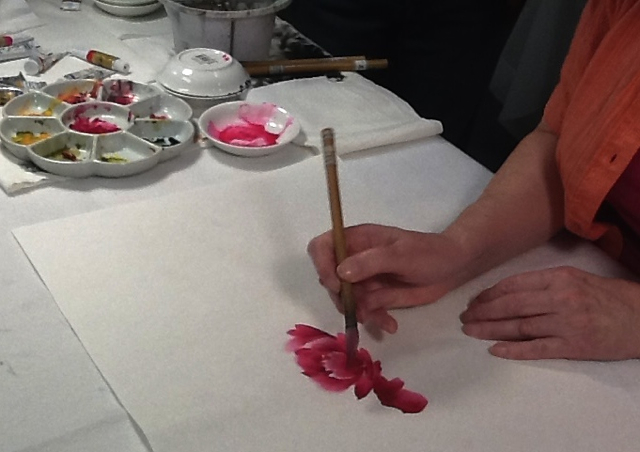
The Inner Cup of Petals
Step 4: complete the inner cup of petals. Tip: think of an actual cup, so you make it rounded. Avoid a flat top.
The Outer Rings of Petals

Step 5: The outer rings. Tip: Vary the size and angle of your petals so your flower doesn't end up looking like a pompom. Keep the handle of the brush horizontal to the paper,with the dark tip pointing towards the center of the flower.
Starting a Bud

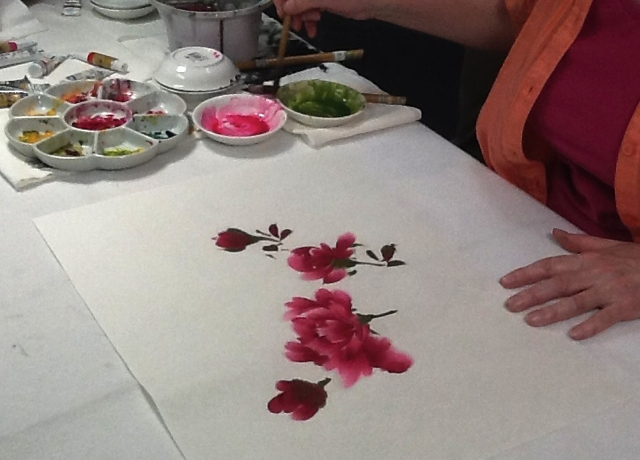
Step 6: Start adding buds or a second, slightly smaller open flower. Note the variation of shades on the petals: that's because of the way I load the brush - first a light wash and then a stronger color at the tip. Tip: avoid lining the flowers up horizontally.

Calyxes and Young Leaves
Step 7: Using a large, springy (hard bristle) brush, mix blue and yellow to make green, then tip the brush with red. Add the calyx, short stem and small leaves round the buds.
Tip: keep the brush upright to paint the stems, but slant the brush for the leaves, using a side stroke.
Tip: paint the stems at a diagonal, not perpendicular or horizontal.
Tip: keep the brush upright to paint the stems, but slant the brush for the leaves, using a side stroke.
Tip: paint the stems at a diagonal, not perpendicular or horizontal.
Green leaves added to red peonies on rice paper

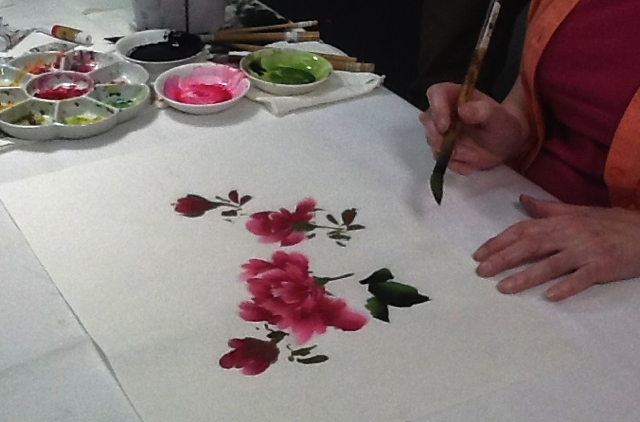
Step 8: Using a large, springy (hard bristle) brush, apply green about halfway up bristles, then add black to the tip. Blend a little on the saucer before painting the leaves.
Tip: Paint the leaves in groups of three, keeping the central flower stem in mind as you do it. Paint dark leaves first, then lighter leaves, and finally add the stem.
Tip: don't make your leaves too "polite". they should touch and overlap.
Tip: Paint the leaves in groups of three, keeping the central flower stem in mind as you do it. Paint dark leaves first, then lighter leaves, and finally add the stem.
Tip: don't make your leaves too "polite". they should touch and overlap.

Guide to Peony Leaves
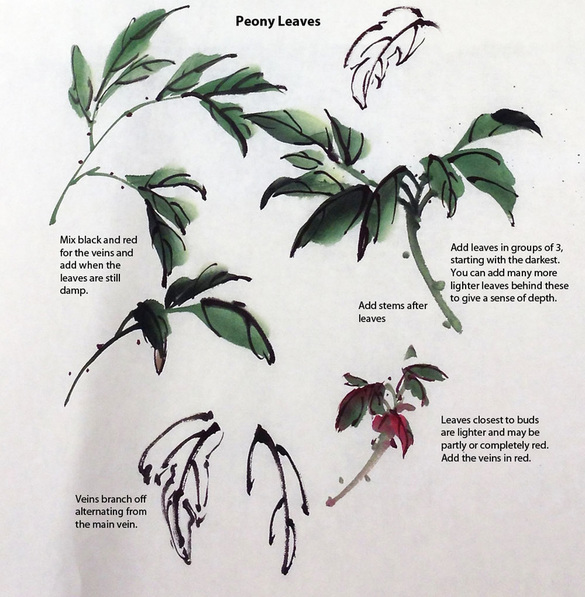
Step 9: Use this guide to understand how the leaves are painted. See how they group round the main stem in the shape of an umbrella. Add the veins with a small brush when the leaves are still damp, but not too wet. Happy Dot is a good brush for this. Tip: add a little rouge tint to the black for the veins so the color is not too starkly black.

Peony and Butterfly
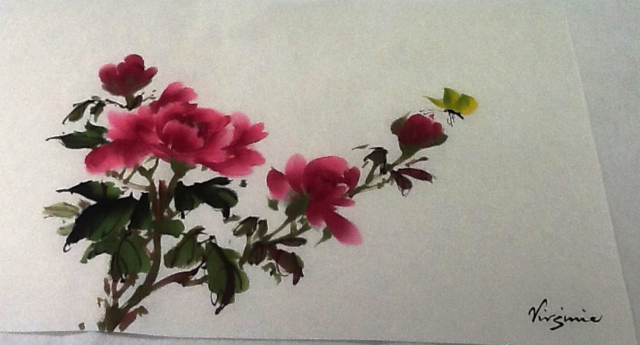
The finished painting, with visiting butterfly. You can also add black ink stamens or white with yellow stamens once the flower is dry. If you would like more help and in-depth demonstrations, my How to Paint Peonies video is available as a DVD or an immediate download.
Facebook is sometimes annoyingly selective in who they show you. The best way is to go directly to my page, which is www.facebook.com/VirginiaLloydDavies
I hope this helps. Good luck and happy painting! - Virginia